A key objective when it comes to implementing a Continuous Integration (CI) strategy is to ensure that there is no general degradation in the quality of code during a development cycle and in providing the earliest possible indication that a change in code has “broken the build”. Also, a lesser concern may be towards identifying the action or individual that has caused such a degradation. When described in this fashion, it may sound like some dispassionate witch-hunt exercise, but this couldn’t be further from the truth. As we are all ultimately human, we are bound to make mistakes at some point, and it is far better these are discovered during a development cycle as opposed to late on a Friday evening, shortly after a failed production system update 🙂
For larger teams, attempting to keep on top of all this can be a challenge, which is why Azure Pipeline automated builds within Azure DevOps is a natural solution to turn towards if you wish to manage some of these pressures. You can use the application to create a build definition for your projects within minutes and then define a variety of conditions that will invoke them - on a daily/hourly schedule, every time a change is made within a branch or even based on manual triggers. Automatic links to relevant work items in Azure Boards can also be created every time a build is triggered and, if a build fails, you can then automatically create a bug and assign it to the individual who requested it for further investigation. In short, you have a powerful arsenal of features at your disposal, all of which are available for free if you have fewer than six developers within your team.
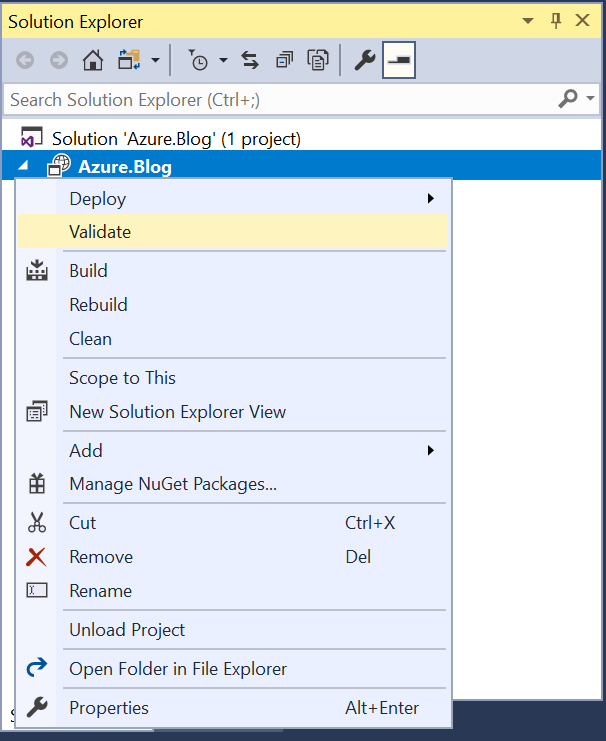
While a build pipeline that has a single task to build a Visual Studio solution file will, in most cases, find obvious code errors (e.g. a missing semi-colon), it is not of particular use in identifying obscure code errors. A good example of this is within an Azure resource template project, which has minimal capability from within Visual Studio or the mentioned task to identify template issues, even ones involving basic syntax errors. Fortunately, within Visual Studio, we have the opportunity to use the Validate option to contact Azure directly and check that our template doesn’t contain anything which could lead to a deployment failure:
We can see how effective this is by attempting to deploy a Microsoft.Web/serverfarm (i.e. an App Hosting plan) resource with an unsupported and very obvious key/value pair supplied which, despite building correctly within Visual Studio, causes an error on deployment:
{
  "$schema": "https://schema.management.azure.com/schemas/2015-01-01/deploymentTemplate.json#",
  "contentVersion": "1.0.0.0",
  "Parameters": {
  },
  "variables": {
  },
  "resources": [
    {
      "apiVersion": "2015-08-01",
      "name": "MyWebAppHostingPlan",
      "type": "Microsoft.Web/serverfarms",
      "location": "[resourceGroup().location]",
      "tags": {
        "displayName": "HostingPlan"
      },
      "sku": {
        "name": "F1",
        "capacity": 1,
        "thiswillerror": "No really, it will."
      },
      "properties": {
        "name": "MyWebAppHostingPlan"
      }
    }
  ],
  "outputs": {
  }
}

Having this functionality available within Visual Studio is all well and good for individual developers, but if you have multiple individuals working on the same template, it becomes increasingly frustrating to carry this test out manually and frequently after any updated code has been checked in. Azure DevOps can come to the rescue here, because, as well as being able to automate your Azure template builds, you can also develop a pipeline that performs the same Validate action with your Azure template. We can even go a step further and deploy out Azure templates to a test environment as a precondition before the build succeeds. The steps involved are pretty straightforward:
- Navigate to your Azure DevOps project and select Pipelines -> Builds. This will open a list containing all build pipelines defined within your project.
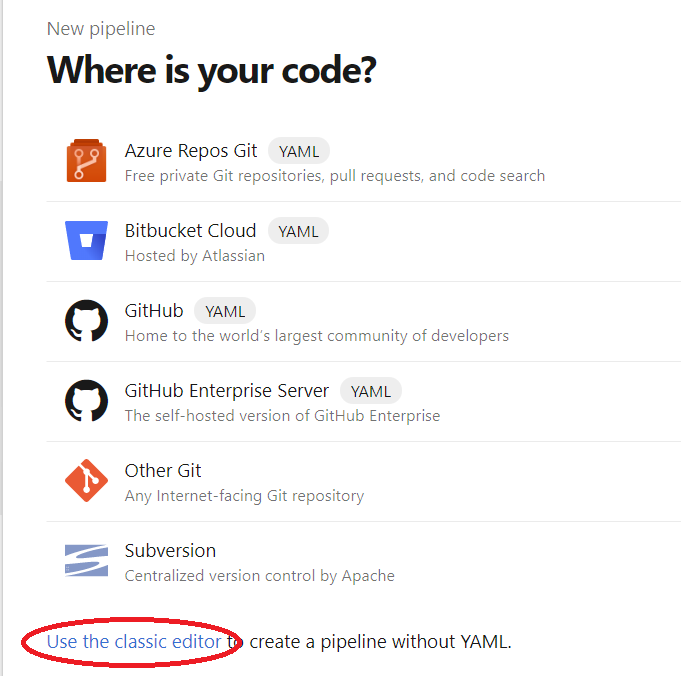
- Select the + New button and then the New build pipeline option. We won’t be using YAML for this example, so select the Use the classic editor option at the bottom of the list:
- On the next screen, select the code repository where your Azure template project resides and then press Continue.
- On the Select a template screen, select the Empty Job button at the top of the list. You are then greeted with an empty Pipeline view, with the Tasks tab visible.
- Under Agent job 1, press the + icon and include the Azure Resource Group Deployment task for the pipeline by pressing the Add button:
- Populate the properties of the Task as follows:
- Display Name: Validate Azure Template
- Azure subscription: Select a valid Azure subscription which has a service connection with Azure DevOps. This may need configuring if not already in place.
- Action: Select the Create or update resource group option
- Resource group: The name of a valid Resource Group in Azure. This should be the same Resource Group where you intend to carry out your test deployment to.
- Template: Select the .json file containing your template. You can use the ellipses button next to the field name to browse through your linked repository to find this.
- Template parameters: Populate this with the repository file path of your parameter file, if being used.
- Deployment mode: Select the Validate option.
- Add on an additional Azure Resource Group Deployment task, configured with the same properties as the previous task, with the exception being the Deployment mode setting, which should be set to Incremental or Complete (be VERY careful with this second option, as it will delete any resource not existing in your template during the deployment if used). The name can also, optionally, be changed to something more descriptive.
- Add on a new Visual Studio Build task after the previously configured task. The only property that requires changing here is the Solution file path, which should be updated to the solution file containing your Azure template project. It’s also recommended, but not necessary, to rename the task accordingly.
- Finally, add on a Publish Build Artifact task. No further modifications are required for this task.

Your build pipeline, if built out correctly, should resemble the below:

We now have a build pipeline in place that runs through the following steps, in order:
- Validate the supplied Azure template file, in the same manner to what we saw earlier within Visual Studio. This step will throw up obvious syntax issues, missing property values etc.
- Once validated, perform a test deployment of the resources to the Resource Group of your choosing. This is required as deployments can typically fail, due to misconfigured dependencies (e.g. only try and deploy a database to a server after the SQL server has deployed successfully, not before) or other issues relating to resource providers or your subscription. This step is also useful in being able to benchmark the expected deployment time for your template.
- With our template confirmed as valid and deploying out successfully, build our Azure template solution file so that we can then…
- …generate the appropriate build artifact, which can then be utilised by a release pipeline.
The next step from here would be to navigate to the Triggers and Options tab, where you can configure the conditions under which the build will trigger and also other options relating to your new build pipeline.
Validating your Azure templates before attempting any deployment is, in my view, a necessary step and one which may end up becoming a difficult task if carried out manually. With the options available to us within Azure DevOps, it’s easier than ever before to automate this process and ensure that you can scale your CI processes to suit teams of any size. If you require any assistance relating to this post or with Azure DevOps more generally, please feel free to leave a comment below or contact me directly.