Welcome to the final post in my blog series concerning Microsoft Exam 70-778, where I hope to provide a revision tool for those planning to take the exam or a learning aid for those looking to increase their Power BI knowledge. Last weeks post discussed a range of topics about access and security when using Power BI as your Business Intelligence solution. We now move onto the final exam focus area - Configure apps and apps workspaces - which tests candidates against the following subjects:
Create and configure an app workspace; publish an app; update a published app; package dashboards and reports as apps
To follow through any of the examples described in this post, you should make sure that you have access to a Power BI Professional subscription. Free sixty day trials are available for this service if required.
Creating Workspaces
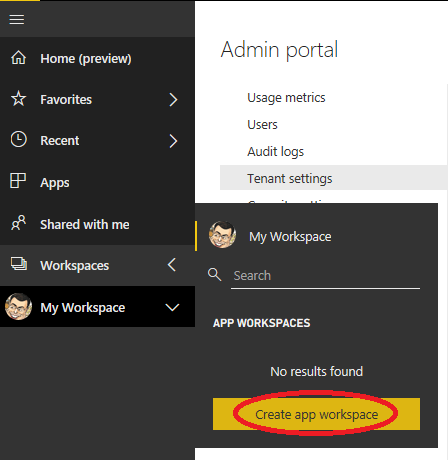
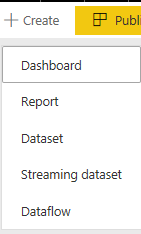
We provided a brief overview of the salient concepts behind a Workspace in last weeks post, chiefly from the perspective of the personal Workspaces that each user has access to from within Power BI Online. As mentioned as part of this discussion, additional workspaces can be created on top of this, to allow for a more logical grouping of Power BI content to become accessible within an organisation. There are a few ways to create a Workspace as part of the “current” experience (more on this later). Workspaces currently take advantage of Office 365 Groups in the background, so creating one of these within the Office 365 Admin Portal will automatically cause a Workspace with the same name to appear within Power BI Online. It is also possible to create all of this from within the Power BI Online interface, by using the Create app workspace button:
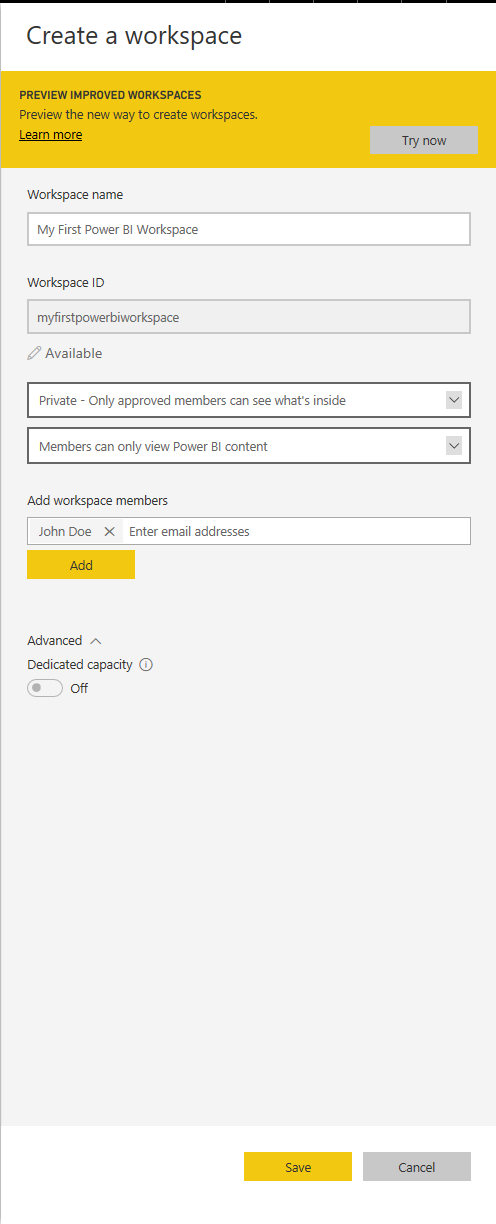
You have a couple of options that can be specified when creating a Workspace, as illustrated in the screenshot below:
- To control how content within a Workspace can be interacted with, you can define whether its membership is Public - Anyone can see what’s inside or Private - Only approved members can see what’s inside. By “anyone”, this refers to any user account that has been provisioned on your Office 365/Azure Active Directory Tenant. You should ensure that the most appropriate option is chosen when the Workspace is created, as it cannot be changed once defined.
- Permissions for all members of a Workspace are definable as either write access (Members can edit Power BI content) or read-only access (Members can only view Power BI content) to anything created within a Workspace.
- If you are fortunate enough to have access to dedicated Power BI Premium capacity, then you can also choose to assign your Workspace to this. Doing this will ensure that the Workspace can benefit from the increased CPU/Memory capacity within your available node(s).
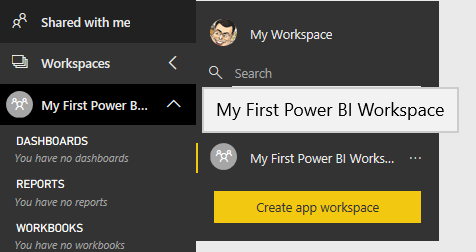
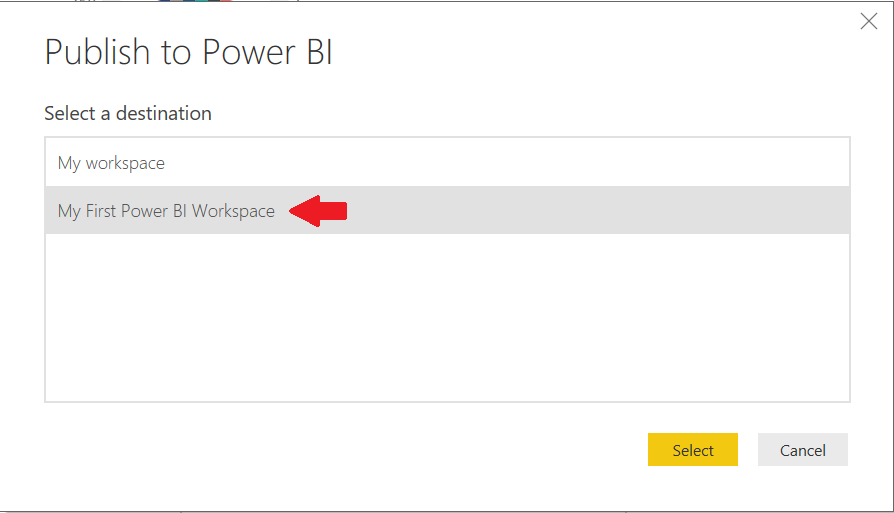
Once created, a Workspace becomes accessible from within the Power BI Online interface and also as a choosable location to publish your .pbix files to from within Power BI Desktop:
It is also possible to add the following components, either from other Workspaces in Power BI or via upload, from within Power BI Online:
As alluded to earlier, the “current” Workspace experience is being overhauled currently, chiefly meaning that there will no longer be a need to create an Office 365 Group in the background. You can find out more about this new experience by reading the Microsoft Docs article on the very subject which, although still in preview, will eventually be something you need to be aware of for the exam.
Publishing Workspaces as an App
To distribute Power BI content to a broader audience, either internally or externally, you can publish all material that has been deployed out to a Workspace as an App. Taking this extra step can help you to simplify any ongoing management of a Workspace as, instead of having to grant access to individual users or Security Groups, you can alternatively create a self-service experience for users across the business, enabling them to install and interact with the Power BI content that is most relevant for their role.
You can create an App from within a Workspace by selecting the Publish app option at the top right of the window:
From here, you must define several different settings across the three tabs listed:
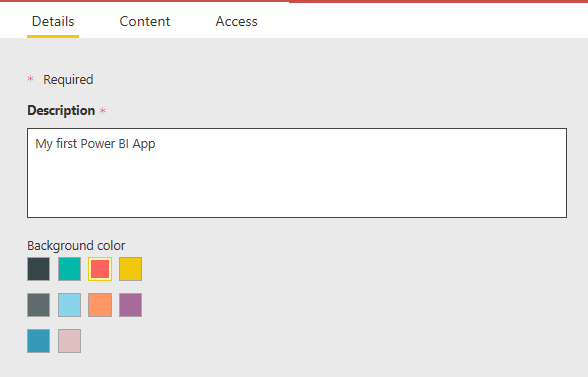
- Details - Allows you to provide a description for the app and also set the Background color that displays to end users, based on a predefined list (i.e. no option to specify a unique hex colour value):
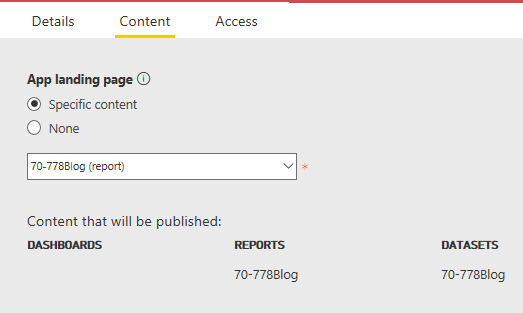
- Content - Let’s you determine the default landing page presented to users when they first load the App. In most cases, it is best to choose a Dashboard, although it is possible to use a Report or have no landing page at all for the App (in this scenario, the user will see a list of all the content included within the App instead). It is also possible to review all of the content that will be published out within the App on this tab:
- Access - Here, you can define who within the organisation can install the App - all users within your Office 365/Azure Active Directory tenant (Entire organization) or a specified list of Users or Security Groups (Specific individuals or group). There is no option to define more granular permissions (e.g. modify the contents within an App), which makes sense given the intended business requirement Apps serve. In most cases, you will probably leave the Entire organization option selected:

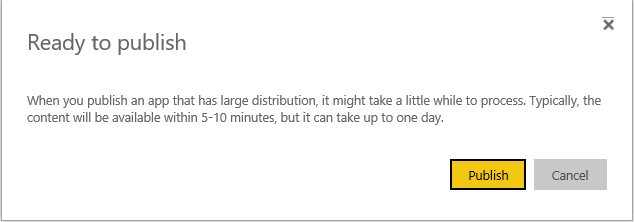
With all settings defined, you can then click the Finish button to get your App published out. Depending on the size of your datasets and Reports, this may take a while, as the below confirmation step advises:
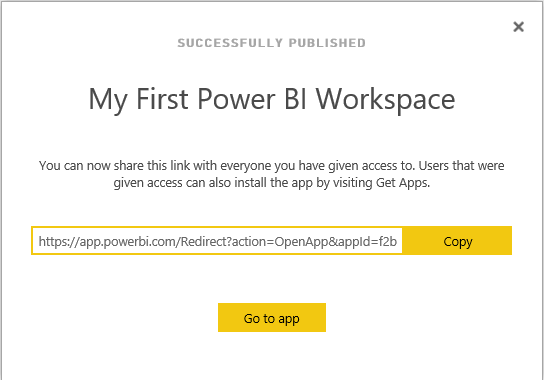
After successfully publishing your App, you are presented with a URL link to it and also have the option to navigate straight to it so that you can verify its contents:
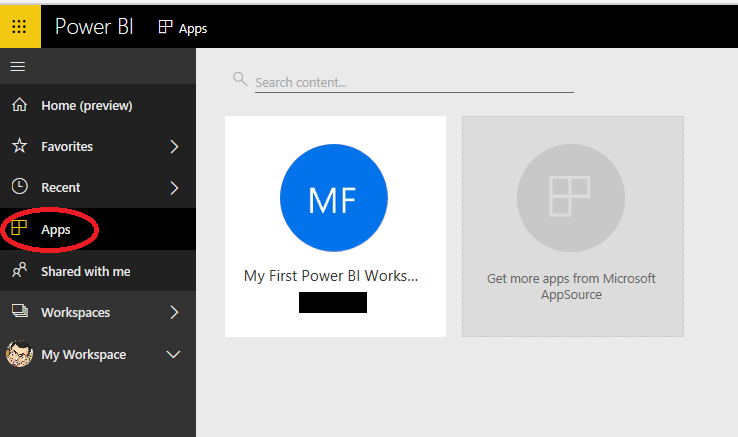
Apps, once installed, can also be accessed from the Apps button on the left-hand pane within Power BI Online:
From an end-users perspective, they would then interact with the newly published App by either:
- Accessing and installing the app using the URL generated in the previous example.
- Navigating to the My organization tab within AppSource and pressing the Get it now button under the corresponding App:

Apps can be updated with new or modified content at any time, without the need for users to install them again. All you would need to do is update the corresponding Workspace and then select the Update app button at the top left of the Workspace window:
The process of re-publishing the App is then identical to when you first publish it out.
ISV developers who have put together a range of Power BI content that integrates with their solution can also publish Apps to the public AppSource store, allowing any Power BI user the world over to install and utilise the content contained within. The process involved here involves several hoops and is not something you need to worry about for the exam.
Key Takeaways
- Workspaces act as a container for the various components that form a Power BI Reporting solution. Within a Workspace, you will find all of the Dashboards, Reports, Workbooks and Datasets that developers have published content to. Each User has a Workspace created for them in Power BI when they first access the service. It is also possible to create additional Workspaces, either through the Power BI Online interface or by creating an Office 365 Group. A new experience for creating Workspaces is currently in preview which, once released, would negate the need for each Workspace to have an associated Office 365 Group.
- When creating a Workspace, you can define various settings such as the type of access each user has (read-only or ability to modify its content), its members and whether it requires assignment to a Power BI Premium node. It is not possible to change the access type for a Workspace after creation, but you can freely change its name or modify its membership at any time.
- The contents of a Workspace can be published as an App, enabling you to expose your solution to a broader audience within or outside your organisation. Once published, users navigate to the Power BI AppSource store for their tenant, which lists all Apps available for installation. Once installed, they will then become visible from within the Apps area of the application. You can update content within an App at any time by republishing its corresponding Workspace. It is also possible to define individual properties within an App, such as its description, access rights and landing page. To install and use Apps, the user in question must have a Power BI Professional license.
We’ve come to the end of the series (at last!) and covered a LOT of content relating to Power BI. I’ll be doing a roundup post next week, where I’ll try and group together all of the posts into the single location, alongside some general exam preperation tips. If you’ve been following the series, thank you for reading and I hope that it has proved to be a useful learning tool 🙂

