
The ability to implement trace logging within CRM plug-ins has been around since CRM 2011, so it’s something that CRM developers should be well aware of. Writing to the trace log is useful for when a plug-in has failed or hit an exception, as within the ErrorDetails.txt file (available to download from the error message box window) will be a list of everything that has been written to the log, up to that point. One issue with this is, if a user encounters an error and does not choose to download this file, then this file is lost - not so much of an issue if the exception can be re-produced, but this may not always the case.
For those who are now working on CRM Online 2015 Update 1 or CRM 2016, then a new feature has been added which further expands this feature - the Plug-in Trace Log. Now, plug-in exceptions can be configured to write to a new system entity, containing full details of the exception, that can be accessed at any time in order to support retroactive debugging. The introduction of this feature means now is the best time to start using trace logging within your plugins, if you are not already. This weeks blog post will take a look at the feature in more detail, assessing its pros & cons and providing an example of how it works in practice.
So, before we begin, why you would want to implement tracing in the first place?
Using tracing as part of CRM Online deployments makes sense, given that your options from a debugging point of view are restricted compared to an On-Premise Deployment. It is also, potentially, a lot more straightforward then using the Plug-in Registration Tool to debug your plugins after the event, particularly if you do not have ready access to the SDK or to Visual Studio. Tracing is also useful in providing a degree of debugging from within CRM itself, by posting either your own custom error messages or feeding actual error messages through to the tracing service.
Just remember the following…
Writing to the tracing service does add an extra step that your plug-in has to overcome. Not so much of an issue if your plugin is relatively small, but the longer it gets, and more frequent you are writing to the service, means there is a potential performance impact. You should use your best judgement when writing to the service; not every time you do something within the plugin, but where there is a potential for an error to occur. Writing to the tracing log can also have an impact on your CRM storage capacity, something we will take a look at later on in this post.
Now that we have got that out of the way, lets begin by setting up an example plugin!
To start writing to the Tracing service depends on how you are implementing your plugin. If you have used the Visual Studio template, then simply use this line of code within the “TODO: Implement your custom Plug-In business logic.” section:
ITracingService tracingService = localContext.TracingService;
Otherwise, you will need to ensure that your plugin is calling the IServiceProvider, and then use a slightly longer code snippet to implement the service. An example of the code that you’d need to use to setup this is as follows:
using System;
//Be sure to add references to Microsoft.Xrm.Sdk in order to use this namespace!
using Microsoft.Xrm.Sdk;

namespace MyPluginProject
{
    public class MyPlugin : IPlugin
    {
        public void Execute(IServiceProvider serviceProvider)
        {
            //Extract the tracing service for use in debugging sandboxed plug-ins.
            ITracingService tracingService = (ITracingService)serviceProvider.GetService(typeof(ITracingService));
        }
    }
}
Once you’ve implemented the ITracingService within your code, you can then write to Trace Log at any time in your code using the following snippet:
tracingService.Trace("Insert your text here...");
Activating Tracing
Even though we have configured our plugin for tracing, this does not automatically mean that our plugin will start writing to the log. First, we must configure the Plug-in and custom workflow activity tracing setting within the System Settings page:
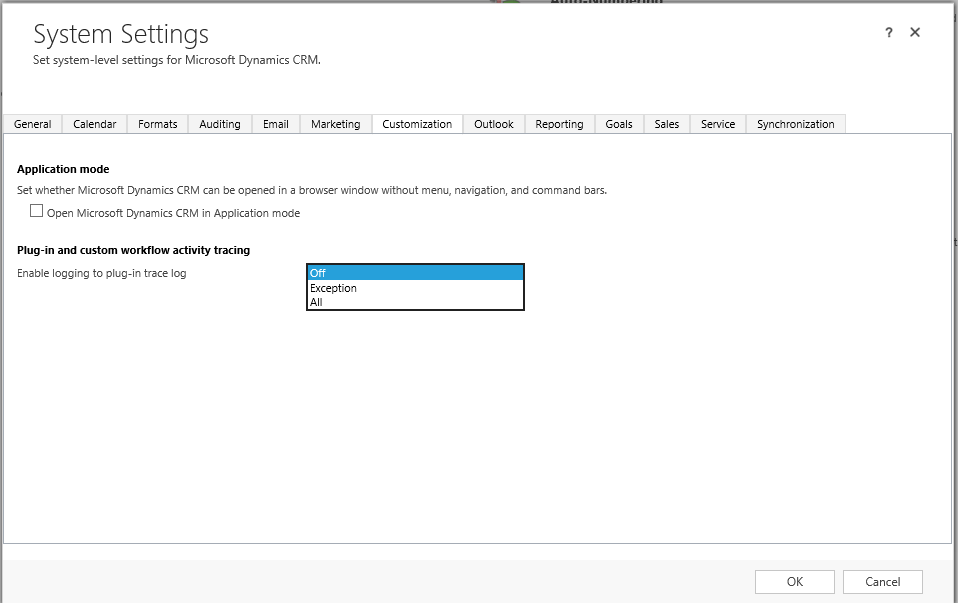
You have three options that you can set:
- Off - Nothing will be written to the trace log, even if the plugin encounters an exception.
- Exception - When the plugin hits an exception, then a trace will be written to the log.
- All - Whenever the plugin is executed and the trace log is called, then a trace log record will be created. This is equivalent to Verbose logging.
As mentioned earlier, individual records will be written to CRM whenever the tracing service is called. It is therefore recommended only to turn on ‘All’ for temporary periods; leaving it on for ‘Exception’ may be useful when attempting to initially diagnose plugin errors. Review the amount of storage available to you on your CRM Online/On-Premise deployment in order to determine the best course of action.
Tracing in Practice
Now that we’ve configured tracing on our CRM and we know how to use the Tracing, lets take a look at an example plugin. The below plugin will be set to fire on the Post-Operation event of the Update message on the Account entity. It will create a new contact record, associate this Contact record to the Account and then populate the Description field on the Contact with some information from the Account record:
protected void ExecutePostAccountUpdate(LocalPluginContext localContext)
{
  if (localContext == null)
    throw new ArgumentNullException("localContext");}

  //Extract the tracing service for use in debugging sandboxed plug-ins.
  ITracingService tracingService = localContext.TracingService;
  tracingService.Trace("Implemented tracing service succesfully!");

  // Obtain the execution context from the service provider.
  IPluginExecutionContext context = localContext.PluginExecutionContext;

  // Get a reference to the Organization service.
  IOrganizationService service = localContext.OrganizationService;

  if (context.InputParameters.Contains("Target"))
  {
    //Confirm that Target is actually an Entity
    if (context.InputParameters["Target"] is Entity)
    {
      Guid contactID;
      string phone;

      Entity account = (Entity)context.InputParameters["Target"];
      tracingService.Trace("Succesfully obtained Account record" + account.Id.ToString());

      try
      {
        tracingService.Trace("Attempting to obtain Phone value...");
        phone = account["telephone1"].ToString();
      }
      catch(Exception error)
      {
        tracingService.Trace("Failed to obtain Phone field. Error Details: " + error.ToString());
        throw new InvalidPluginExecutionException("A problem has occurred. Please press OK to continue using the application.");
      }
      if (phone != "")
      {
        //Build our contact record to create.
        Entity contact = new Entity("contact");
        contact["firstname"] = "Ned";
        contact["lastname"] = "Flanders";
        contact["parentcustomerid"] = new EntityReference("account", account.Id);
        contact["description"] = "Ned's work number is " + phone + ".";
        contactID = service.Create(contact);
        tracingService.Trace("Succesfully created Contact record " + contactID.ToString());
        tracingService.Trace("Done!");
      }
      else
        tracingService.Trace("Phone number was empty, Contact record was not created.");
    }
  }
}
After registering our plugin and with tracing configured for “All” in our CRM instance, we can now see our custom messages are being written to the Trace Log - when we both update the A. Datum Corporation (sample) record Phone field to a new value and when we clear the field value:


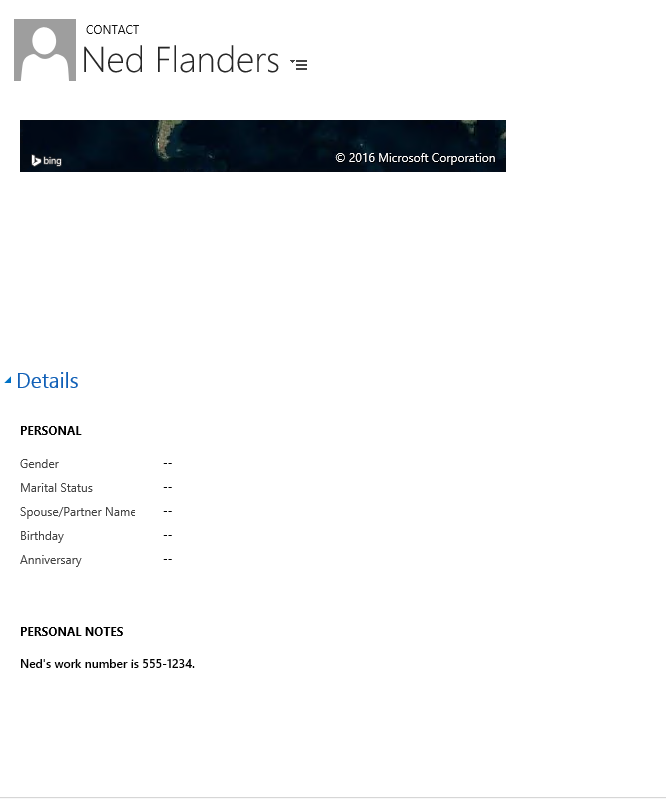
Most importantly, we can also see that our test Contact record is being created successfully when we populate the Phone field with data 🙂
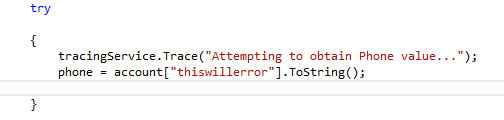
Now, to see what happens when an error is invoked, I have modified the code above so that it is expecting a field that doesn’t exist on the Account entity:
Now, when we attempt to update our Account record, we receive a customised Business Process Error message and window:

And we can also see that the precise error message has been written to the trace log, at the point we specified:

Last, but not least, for On-Premise deployments…
One thing to point out is, if you are using On-Premise CRM 2016 (both 8.0 and 8.1), then for some reason the trace log will not work if you do not run you plugin within sandbox isolation mode. I’m not the only one experiencing this, according to this post on the Dynamics CRM Community forum. Switching my test plugin to sandbox isolation resolved this issue. A bit of a strange one, and as Srikanth mentions on the post, it is not clear if this a bug or not.
Conclusions or Wot I Think
Trace logging is one of those things where time and place matter greatly. Implementing them within your code obsessively does not return much benefit, and could actually be detrimental to your CRM deployment. Used prudently and effectively though, they can prove to be incredibly useful. The scenarios where I can see them returning the most benefit is if your plugin is making a call to an external system and, if an error is encountered during this process, you can use the Trace Log to capture and store the external application error message within CRM for further investigation. Trace logging can also prove useful in scenarios where an issue cannot be readily replicated within the system, by outputting error messages and the steps leading up to them within the Trace Log.
In summary, when used in conjunction with other debugging options available to you via the SDK, Trace Logging can be a powerful weapon to add to your arsenal when debugging your code issues in CRM.