
I was chatting with the legendary George “The Enabler” Doubinski a while back, and he very rightly pointed out that a post I did a few years back on connector options involving Power BI Desktop, Dynamics 365 Customer Engagement and Common Data Service Microsoft Dataverse was…a little out of date. 😅 Two years, as it happens, is a lifetime in the Microsoft Business Applications space, and a lot has happened since the post went live. So let’s do a review of the landscape as it stands today (September 2021), see what’s available and, most crucially, what’s changed. And be aware, if you are reading this in 2023, things could have changed yet again. 😉
At the time of writing this post, we have five options available to us:
- The Microsoft Dataverse Connector
- The Common Data Service (Legacy) Connector
- The Dynamics 365 (online) Connector
- The Web Connector, i.e., directly querying the applications Web API endpoint
- Using the Power Query (M) Builder community tool
Each option has its own distinct set of advantages and disadvantages. In this post, we’ll evaluate this in a little more detail to hopefully assist you in determining the most suitable one for your particular situation.
Microsoft Dataverse Connector
Last year, Microsoft made two key announcements relating to how we can query data from Dataverse:
- A SQL endpoint was released into public preview. This allows us not only to use SQL Server Management Studio (SSMS) to connect to our Dataverse environments but also now supports capabilities such as DirectQuery and Query Folding when connecting via this endpoint.
- In December last year, the SQL endpoint for Power BI scenarios only entered general availability. In support of this, a brand new connector was released, known as the Microsoft Dataverse Connector
As a consequence of this, we see we have the appropriate new connector option available to us within the desktop application:

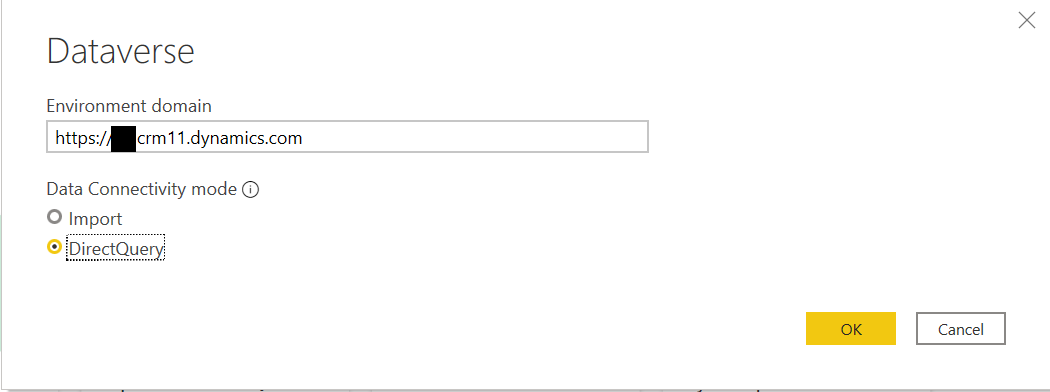
If we select this connector, we then need to specify two options:
- Server URL: The server URL for your Microsoft Dataverse environment. Note that this should exclude the URL scheme (i.e. the https:// bit). For tenants within the United Kingdom, this will typically be in the format <My CRM Instance>.crm11.dynamics.com.
- Data Connectivity Mode: Similar to when working with any other SQL Server endpoint, we can choose to either fetch and store data locally from Dataverse (Import) or have a persisted connection that will always bring us the latest data (Direct Query). Choose the option that makes sense for your particular scenario.
Press OK, sign-in if prompted, and then you should see a Navigator window similar to the one below:
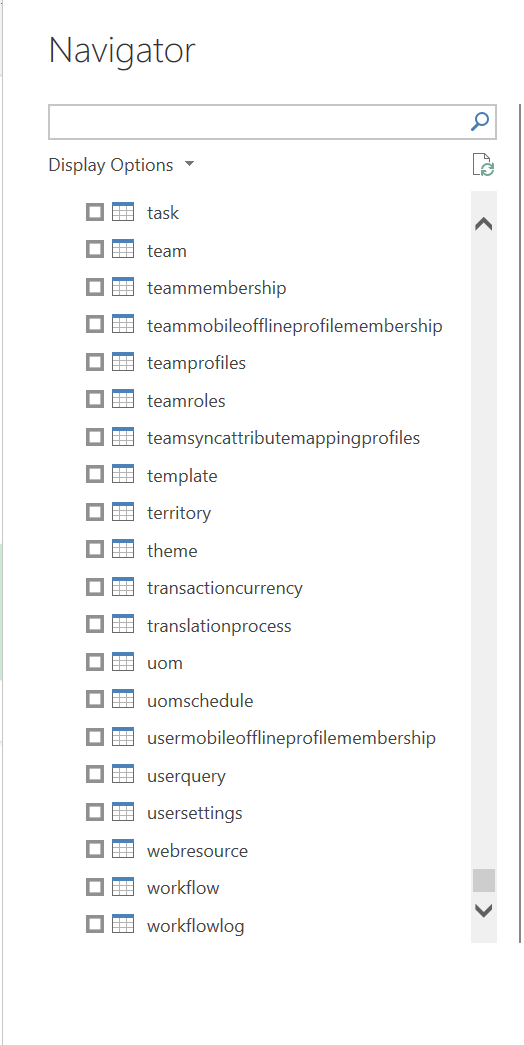
From there, you will then be able to retrieve data from all of the tables available within the instance. Any selected table data will then load into the Power Query model after pressing the Load button. You can also click the Edit button to automatically load the Power Query Editor, thereby allowing you to carry out additional transformations to your data.
Use the Common Data Service Connector when:
- You want to align towards where Microsoft is making future investments.
- You need to leverage Direct Query capability as part of your report.
- You don’t have a requirement to interact with or execute custom Functions/API’s from Power BI.
- For Import mode reports less than 80MB in size, which don’t use pagination or leverage tables using the image data type; see below for further details.
Common Data Service (Legacy) Connector
The Common Data Service Connector (Legacy) is, as the name implies, the “old” connector, which only came out of public preview in 2019. Only the good die young… 😭 The Legacy connector does support the latest version of the application’s Web API and has several useful options to help model returned data. However, it will not see any further investments from Microsoft, and it’s use should be discouraged wherever possible. The connector can be accessed via the Get Data option on Power BI Desktop, as illustrated below:

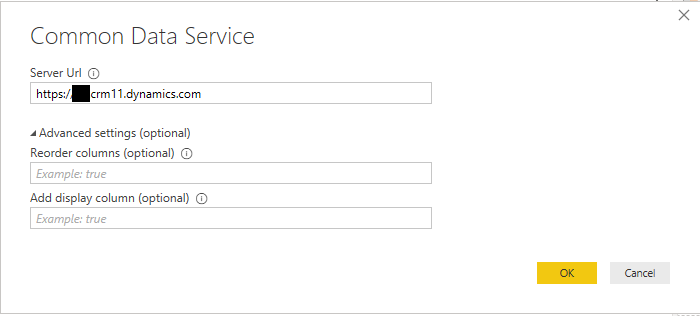
Once selected and, as indicated below, you must then specify the following options:
- Server URL: The server URL for your Microsoft Dataverse environment. For tenants within the United Kingdom, this will typically be in the format https://<My CRM Instance>.crm11.dynamics.com.
- Reorder columns: If set to true, the connector will return all table data columns in alphabetical order.
- Add display column: If set to true, Power BI will include an additional column for specific data types to assist with readability. For example, Choice fields will return the Display Label. I recommended that the Reorder columns and Add display column options are always set to true.
By pressing OK and, after logging in with an Organizational Account with sufficient privileges to access the instance, you will see a list of tables (entities) that you can select:
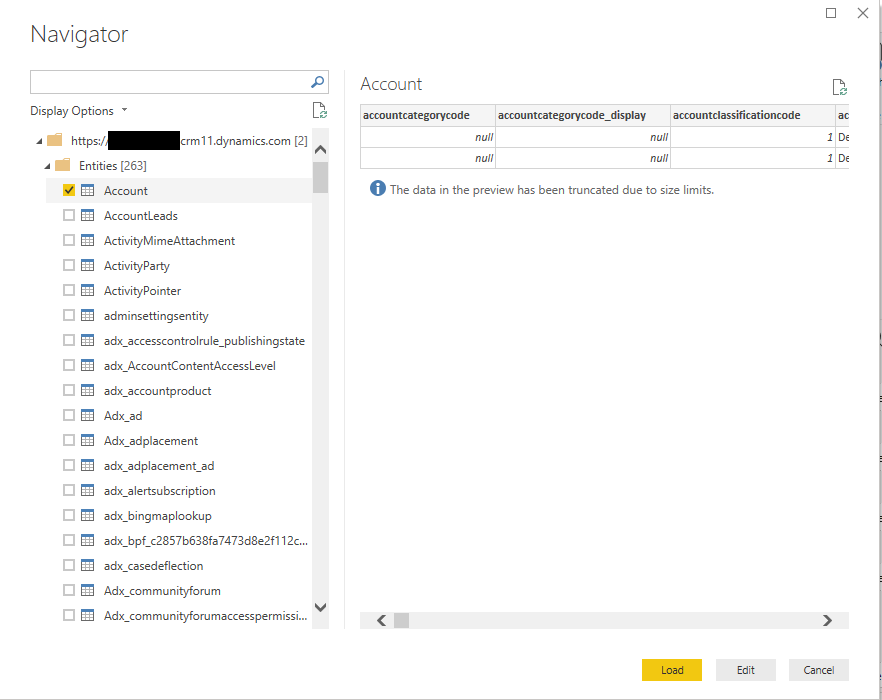
The Entities folder will display a list of all distinct tables from Microsoft Dataverse, formatted using the table logical name. Any selected table data will then load into the Power Query model after pressing the Load button. You can also click the Edit button to automatically load the Power Query Editor, thereby allowing you to carry out additional transformations to your data.
Use the Common Data Service Connector when:
Microsoft specifically recommend using this connector if your dataset is over 80MB in size, if you need paging support or if you are using image data within your tables. Beyond this, I would not recommend you use this. Despite having some handy options to sort columns by alphabetic order and to return choice labels, more than likely, using the legacy connector will store up problems, as you would need to migrate it across to the Microsoft Dataverse connector in the future. So best to avoid this by being proactive up-front.
Dynamics 365 (online) Connector
Before Microsoft released the previous connector into general availability, the Dynamics 365 (online) Connector was the only Dataverse connector for Power BI Desktop. It’s accessed in much the same way, from within the Online Sources tab on the Get Data dialog window:

Once selected, the options available for selection are spread across the Basic and Advanced radio buttons:
- Within the Basic tab, you must specify a single option – the full Web API URL from the application. This value can be obtained by navigating to the Developer Resources area within the classic interface and locating the Instance Web API URL. For instances located in the United Kingdom, this will typically be in the format of https://<My CRM Instance>.crm11.dynamics.com/api/data/v9.1/. You also can specify different versions of the API to use, ranging from the following options:
- v8.0
- v8.1
- v8.2
- v9.0
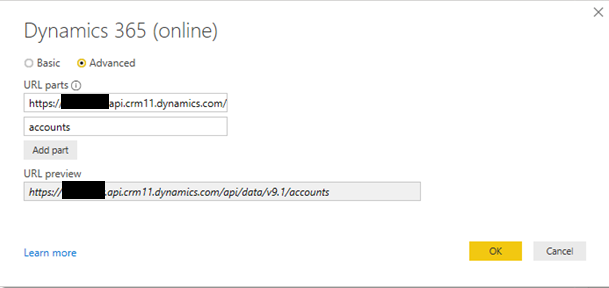
- The Advanced tab allows you to specify additional query parts URL parts as part of the given Web API URL. For example, the screenshot below shows an example of how to use the URL parts to return data from the Accounts entity only:
If the Basic options are utilised, then data is returned in the same manner as the Common Data Service Connector. This then allows you to select and preview data from multiple tables before loading it into your model.
Use the Dynamics 365 (online) Connector when:
Just like the Common Data Service (Legacy) connector, I would again discourage you from using this connector. I suspect that, over time, this connector will eventually go the way of the Dodo and that the Microsoft Dataverse option will be the only option for us to use instead.
Web
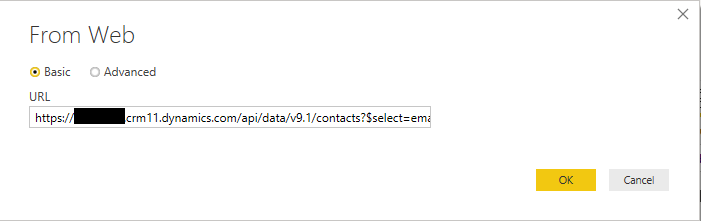
The Web connector utilises the Web API OData Feed, similar to the Dynamics 365 (online) Connector, but with the scope to fully leverage custom Web API OData queries. For example, let’s assume you have the following Web API URL to return filtered Contact entity data:
https://<My CRM Instance>.crm11.dynamics.com/api/data/v9.1/contacts?$select=emailaddress1,fullname&$filter=contains(firstname, ‘Joe’)&$orderby=fullname asc
We can enter this URL into the From Web connector dialog box to return the results of that specific query:
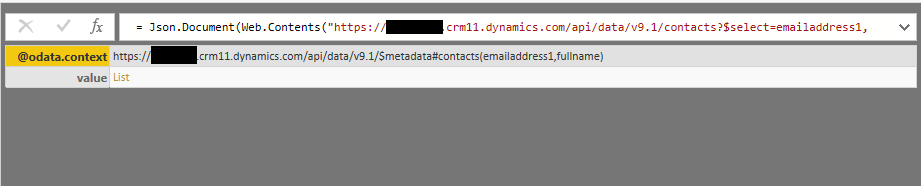
Data will then load into the Power Query Editor as a JSON object. You must then click the List hyperlink to expand out and return a list of all records within a tabular format:
To understand the types of things that you can do with the Web API, I recommend that you take a look through the Microsoft Docs article that is dedicated to this subject.
Use the Web Connector when:
- You have previously authored OData or FetchXML queries and wish to re-use them within Power BI Desktop.
- You are comfortable working with web API’s and the Power Query Editor. Similar to the Dynamics 365 (online) Connector, you should anticipate some work to ensure that, for example, option set values are displayed correctly.
- You require granular control over the various D365CE Web API options.
- You need to call custom functions, actions, or Custom API’s within your Dataverse environment.
Power Query (M) Builder
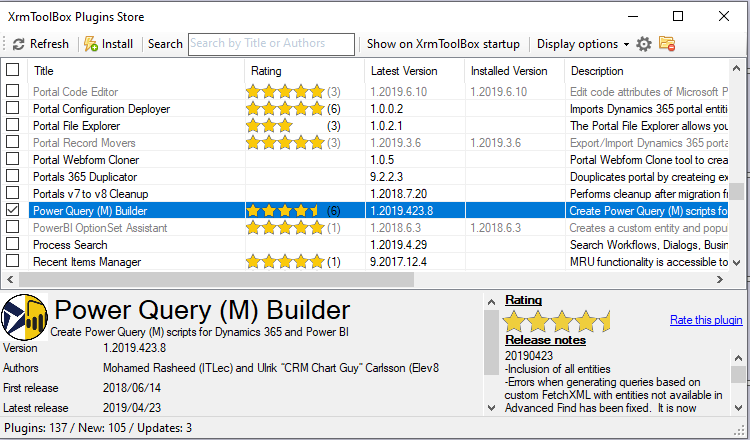
The Power Query (M) Builder application is a community plugin, available as part of the freely distributed XrmToolBox. The XrmToolBox brings together several handy tools for Dynamics 365 Customer Engagement administrators, developers, and customisers. Once you have downloaded the XrmToolBox, the Power Query (M) Builder application can be installed by navigating to the Plugins Store within the application:
Once installed, you can then use the tool to:
- Select the entity data that you wish to query from Power BI. This is achieved by defining the fields that you want to return based on an existing table view or by specifying the list of fields to return within the tool.
- Bring in any existing FetchXML queries and convert them into Power Query M code.
- Generate M queries for returning entity data and any related Option Set information.
The plugin has an intuitive interface that allows you to build your queries by selecting the entity/fields you would like to work with. In the example below, the Accounts I Follow view has been chosen to generate an M query code snippet:
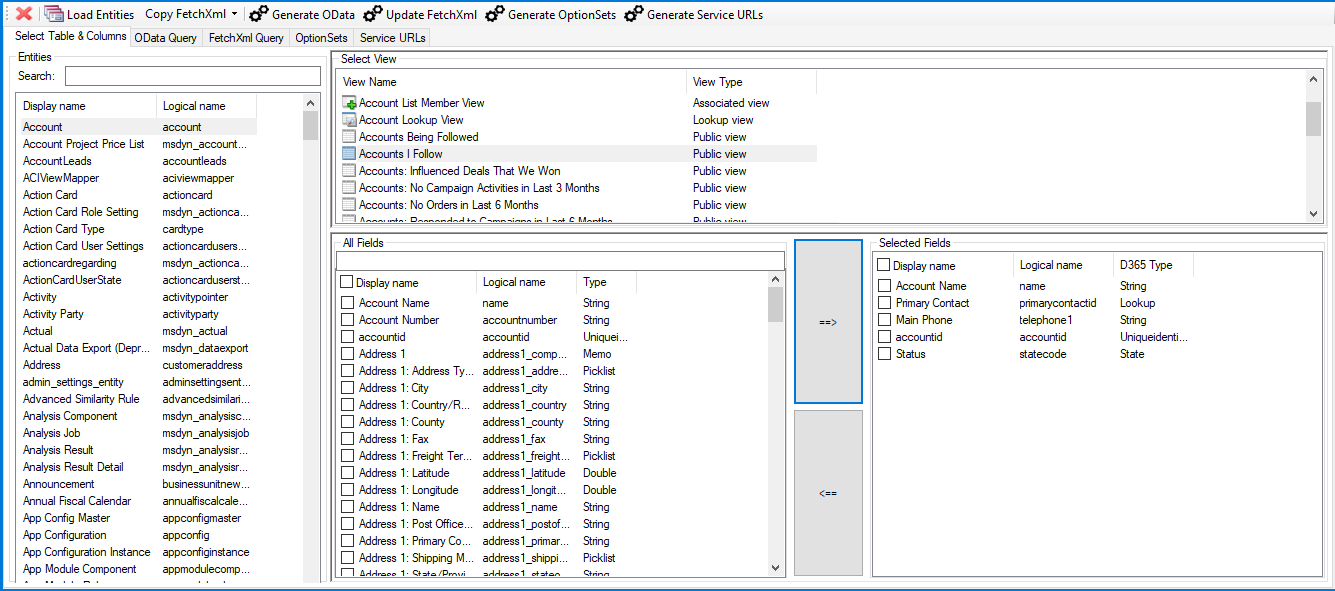
Code generated within the tool via the GenerateOData and GenerateOptionSets buttons can then be straightforwardly copied across into Power BI by using the Blank Query data source and using the Advanced Editor option to paste in any relevant code:

Use the Power Query (M) Builder when:
- You are already using the XrmToolBox daily and are familiar with its core components.
- You have existing custom views or FetchXML queries that you want to re-use within Power BI Desktop, and you are looking for an easy way to migrate these across.
- You have a basic awareness of using the Power Query Editor and are looking for a solution that involves you writing a minimal amount of code.
I hope this post has been useful in demonstrating the options available to work with your Microsoft Dataverse / Dynamics 365 Customer Engagement data from within Power BI Desktop. Please leave a comment below if you have any questions.