After going through a few separate development cycles involving Dynamics 365 Customer Engagement (D365CE), you begin to get a good grasp of the type of tasks that need to be followed through each time. Most of these are what you may expect - such as importing an unmanaged/managed solution into a production environment - but others can differ depending on the type of deployment. What ultimately emerges as part of this is the understanding that there are certain configuration settings and records that are not included as part of a Solution file and which must be migrated across to different environments in an alternate manner.
The application has many record types that fit under this category, such as Product or Product Price List. When it comes to migrating these record types into a Production environment, those out there who are strictly familiar with working inside the application only may choose to utilise the Advanced Find facility in the following manner:
- Generate a query to return all of the records that require migration, ensuring all required fields are returned.
- Export out the records into an Excel Spreadsheet
- Import the above spreadsheet into your target environment via the Data Import wizard.
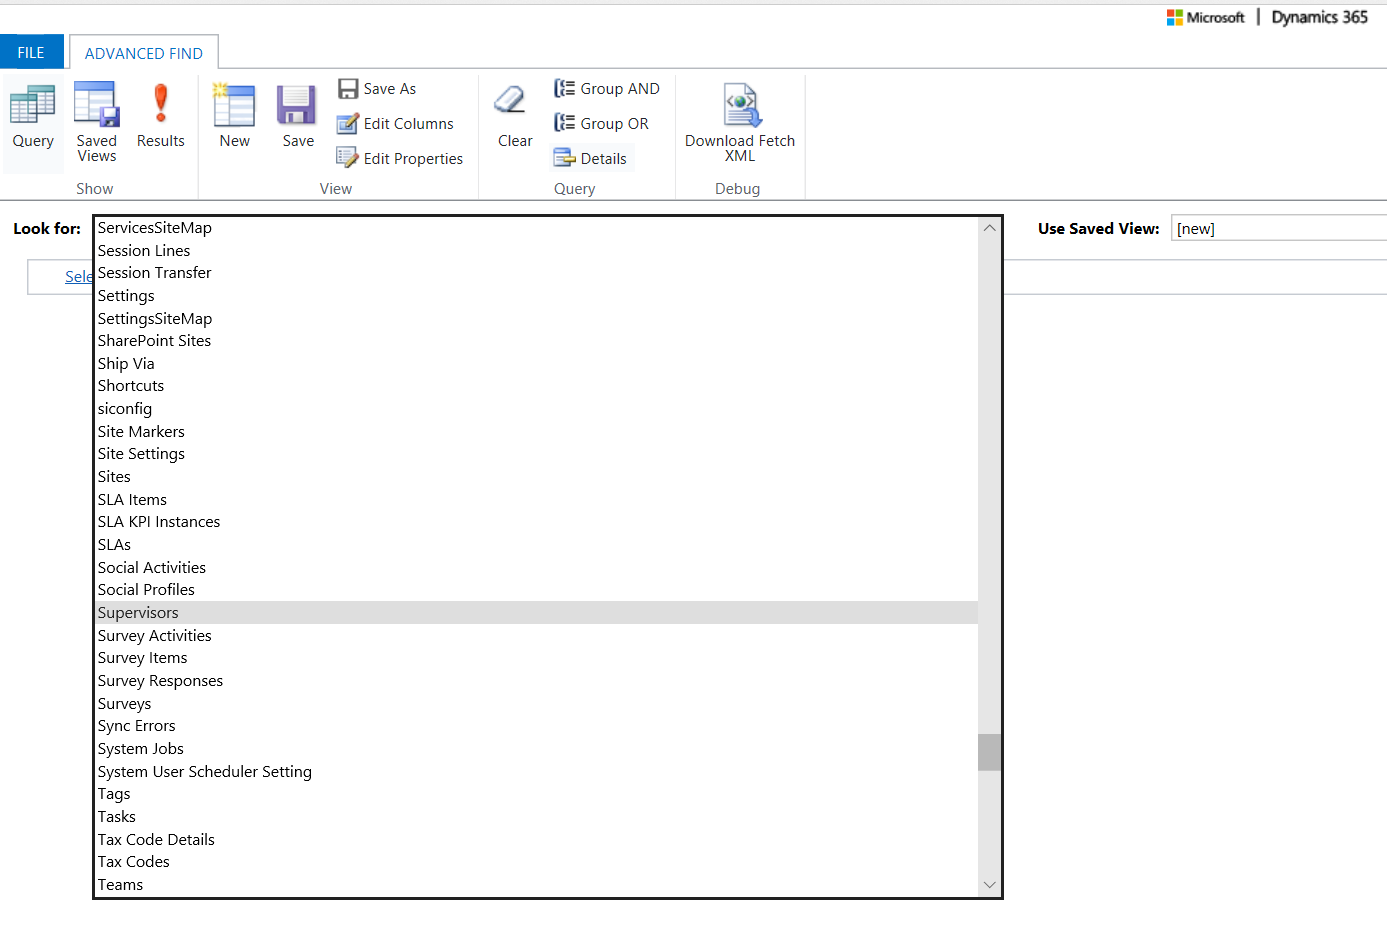
And there would be nothing wrong with doing things this way, particularly if your skillset sits more within a functional, as opposed to technical, standpoint. Where you may come unstuck with this approach is if you have a requirement to migrate Subject record types across environments. Whilst a sensible (albeit time-consuming) approach to this requirement could be to simply create them from scratch in your target environment, you may fall foul of this method if you are utilising Workflows or Business Rules that reference Subject values. When this occurs, the application looks for the underlying Globally Unique Identifier (GUID) of the Subject record, as opposed to the Display Name. If a record with this exact GUID value does not exist within your target environment, then your processes will error and fail to activate. Taking this into account, should you then choose to follow the sequence of tasks above involving Advanced Find, your immediate stumbling block will become apparent, as highlighted below:
As you can see, there is no option to select the Subject entity for querying, compounding any attempts to get them exported out of the application. Fortunately, there is a way to get overcome this via the Configuration Migration tool. This has traditionally been bundled together as part of the applications Solution Developer Kit (SDK). The latest version of the SDK for 8.2 of the application can be downloaded from Microsoft directly, but newer versions - to your delight or chagrin - are only available via NuGet. For those who are unfamiliar with using this, you can download version 9.0.2.3 of the Configuration Migration tool alone using the link below:
Microsoft.CrmSdk.XrmTooling.ConfigurationMigration.Wpf
With everything downloaded and ready to go, the steps involved in migrating Subject records between different D365CE environments are as follows:
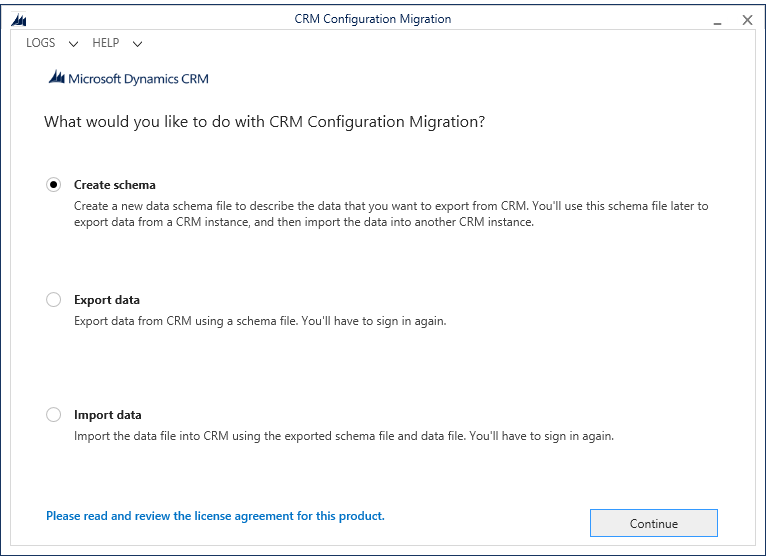
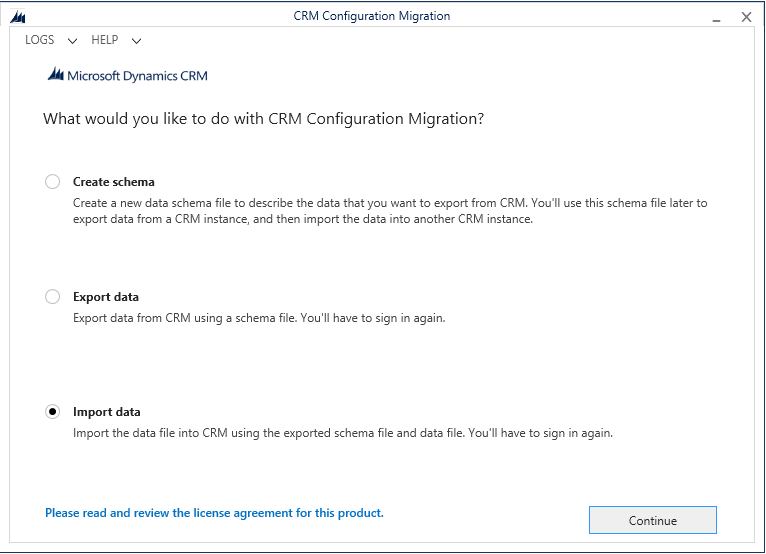
- The first step before any export can take place is to define a Schema - basically, a description of the record types and fields you wish to export. Once defined, schemas can be re-used for future export/import jobs, so it is definitely worth spending some time defining all of the record types that will require migration between environments. Select Create schema on the CRM Configuration Migration screen and press Continue.
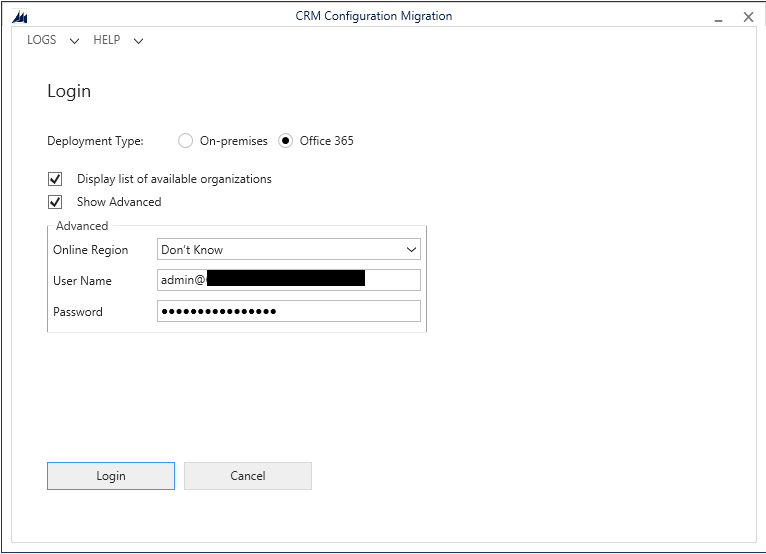
- Login to D365CE using the credentials and details for your specific environment.
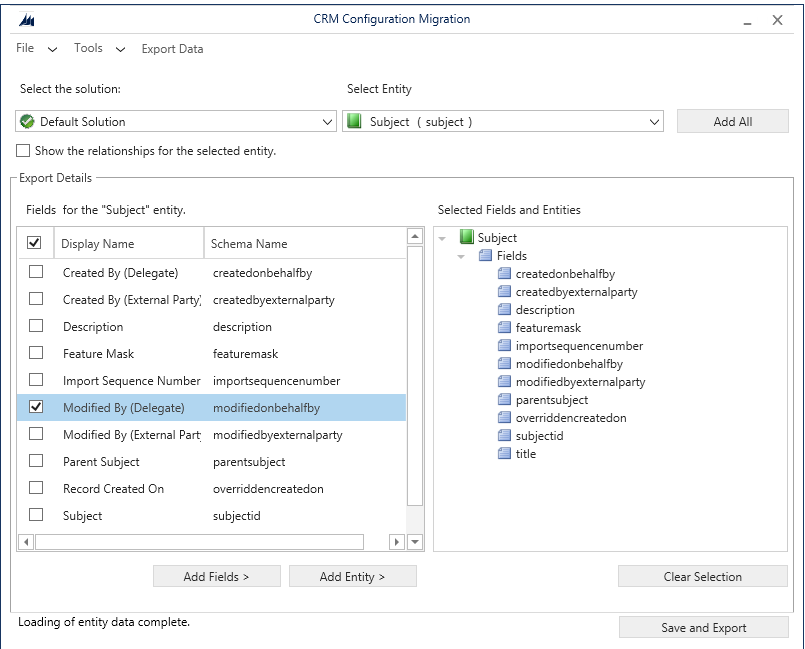
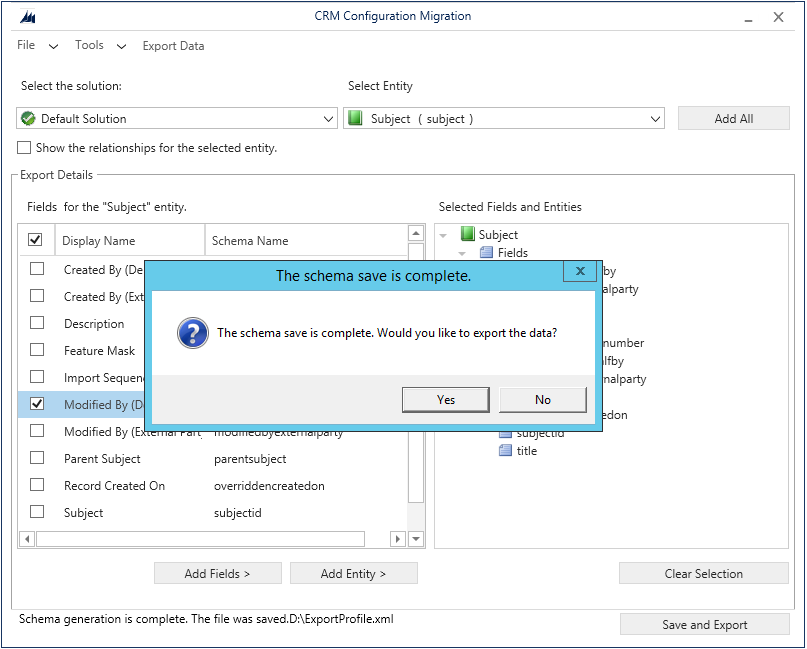
- After logging in and reading your environment metadata, you then have the option of selecting the Solution and Entities to export. A useful aspect to all of this is that you have the ability to define which entity fields you want to utilise with the schema and you can accommodate multiple Entities within the profile. For this example, we only want to export out the Subject entity, so select the Default Solution, the entity in question and hit the Add Entity > button. Your window should resemble the below if done correctly:
- With the schema fully defined, you can now save the configuration onto your local PC. After successfully exporting the profile, you will be asked whether you wish to export the data from the instance you are connected to. Hit Yes to proceed.
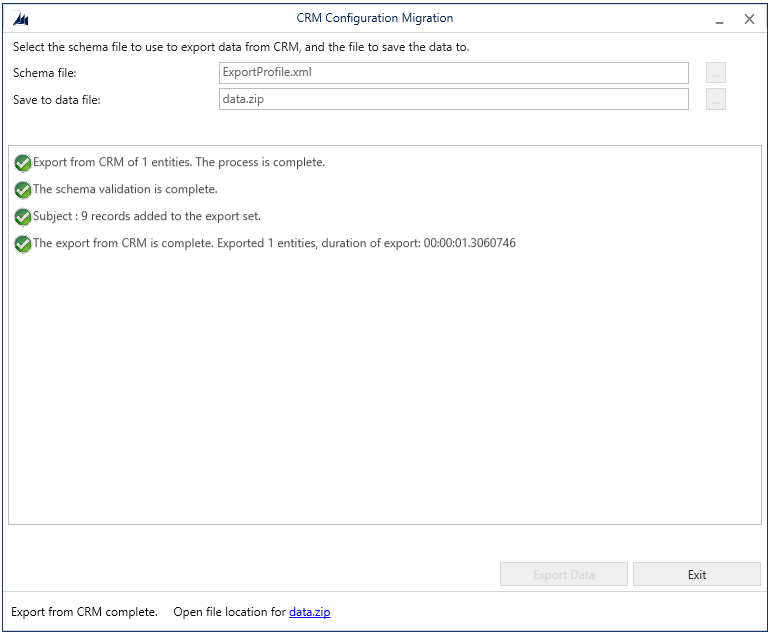
- At this point, all you need to do is define the Save to data file location, which is where a .zip file containing all exported record data will be saved. Once decided, press the Export Data button. This can take some time depending on the number of records being processed. The window should update to resemble the below once the export has successfully completed. Select the Exit button when you are finished to return to the home screen.
- You have two options at this stage - either you can either exit the application entirely or, if you have your target import environment ready, select the Import data and Continue buttons, signing in as required.
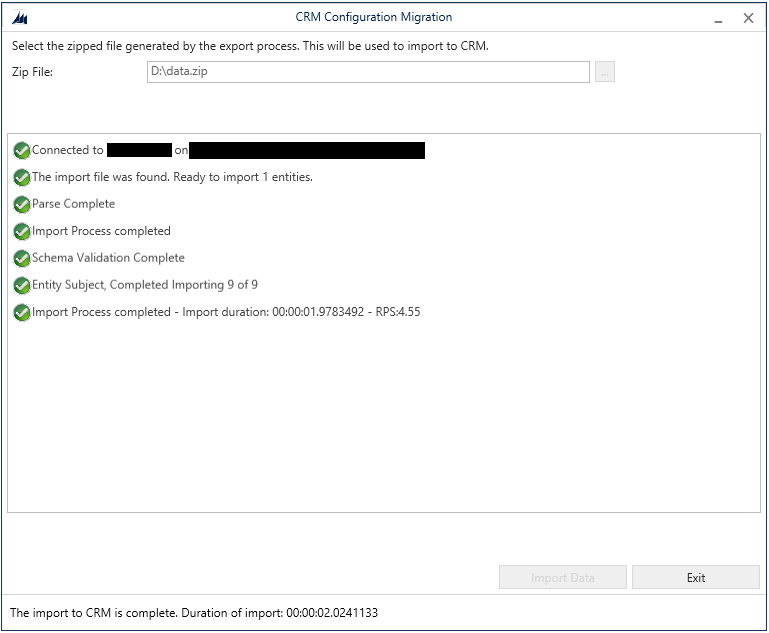
- All that remains is to select the .zip file created in step 5), press the Import Data button, sit back and confirm that all record data imports successfully.
It’s worth noting that this import process works similarly to how the in-application Import Wizard operates with regards to record conflicts; namely, if a record with the same GUID value exists in the target instance, then the above import will overwrite the record data accordingly. This can be helpful, as it means that changes to records such as the Subject entity can be completed safely within a development context and promoted accordingly to new environments.
The Configuration Migration tool is incredibly handy to have available but is perhaps not one that it is shouted from the rooftops that often. It’s usefulness not just extends to the Subject entity, but also when working with the other entity types discussed at the start of this post. Granted, if you do not find yourself working much with Processes that reference these so-called “configuration” records, then introducing the above step as part of any release management process could prove to be an unnecessary administrative burden. Regardless, there is at least some merit to factor in the above tool as part of an initial release of a D365CE solution to ensure that all development-side configuration is quickly and easily moved across to your production environment.
