I was interested to read on TechNet that it is now supported to perform a Multiple-Server role installation of Dynamics CRM 2016 on Windows Server 2012 R2 instances that are configured in Core installation mode:
With the exception of the Microsoft Dynamics CRM Help Server and Microsoft Dynamics CRM Reporting Extensions roles, you can install any Microsoft Dynamics CRM 2016 Server server role on a Server Core installation of Windows Server.
Source: https://technet.microsoft.com/en-us/library/hh699671.aspx
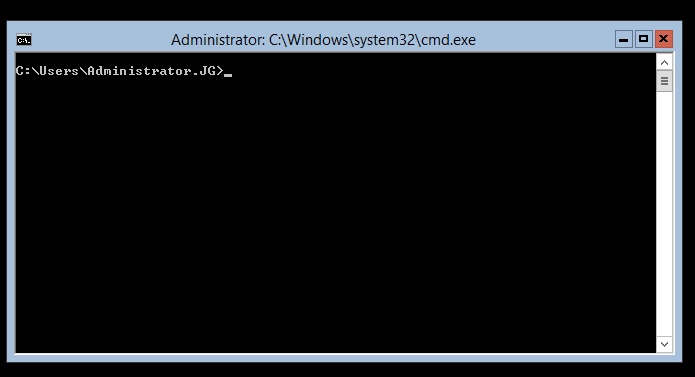
At this stage you may be asking, “What is a Core installation of Windows Server 2012 R2?” or “Why would it be preferable to install CRM on a Core Server?”. Starting from Windows Server 2008, server admins can choose to install Windows Server without a GUI interface and without most of the common features that you would expect from a Windows Desktop environment. All you are able to see and interact with if you choose to log into a Windows Server core is the following:
I would imagine that most novice service admins (like me!) would start panicking at this stage…
The idea behind Core installations is that the server would be administered remotely from a server/desktop environment (using Server Manager, Powershell etc.), with it being really unlikely that you would need to logon or remotely connect to the server via remote desktop connection. As a Core installation is missing pretty much everything you would expect from a standard Windows working environment, it is potentially ideal for scenarios where you have limited resources within your virtualised server environment. Alternatively, if you are intending to deploy a resource-intensive application to the server (like Dynamics CRM!), ensuring that the application has access to as many system resources as possible could be desirable. More information about Core installations, including their supported roles/features, can be found on this helpful MSDN article.
So lets go through the process of setting up a Windows Server 2012 R2 Core Installation and then performing a CRM installation on the machine for all roles, with the exception of the ones highlighted above. We’ll take a look at some of the options available to us as part of a silent install and evaluate to see what the benefits are for an organisation to deploy On-Premise CRM in this manner:
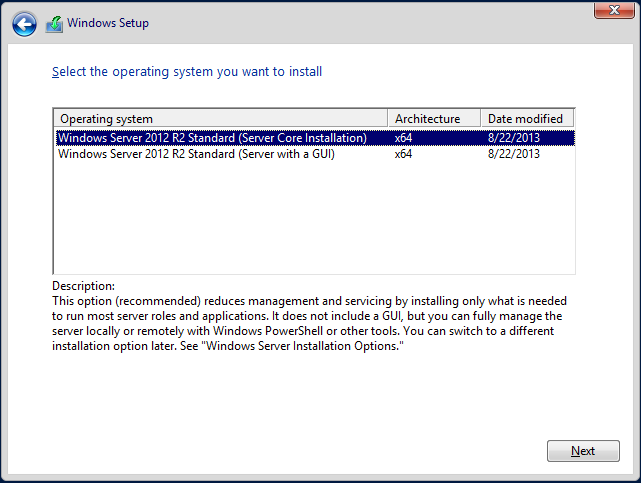
- To start off, we need to get our Windows Server 2012 R2 instance setup. The installation of this is really straight-forward and simple, so will not be covered in-depth. The only thing you need to note is that Server Core Installation option needs to be specified, as opposed to Server with a GUI, as you go through the required steps:
- Once your server is setup and you have logged in for the first time, you will need to get the server joined to the domain that will be used for your Dynamics CRM instance. Fortunately, this can be rather straightforwardly done in Server Core by using the SConfig command on the prompt window. Type in the following in the command prompt window and hit return:
sconfig
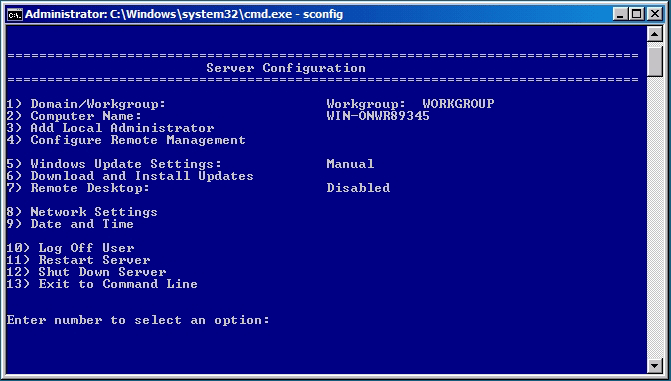
The command prompt window will turn blue and change to resemble the following (image courtesy of Technet):
At this point, type 1 and hit enter, following the instructions in order get the Server connected to your target domain. A restart will be required as part of this. An (optional) step before restarting is to also rename the Computer to something more description e.g. CRM-SERVER.
- Once your server is on the Domain, you can disconnect from the Core server for now. In order to get underway with the installation, there is some prep work that needs completing first, which will require having the following files downloaded:
-
- Microsoft Dynamics CRM Installation executable (.exe)
- A configuration .xml file for the install. This is what the installer will refer to during the installation process for all of the required options. For this example, we will be using the following .xml file:
- Microsoft Dynamics CRM Installation executable (.exe)
-
<CRMSetup>
  <Server>
    <Patch update="true"></Patch>
    <LicenseKey>XXXXX-XXXXX-XXXXX-XXXXX-XXXXX</LicenseKey>
    <SqlServer>MySQLInstance</SqlServer>
    <Database create="true"/>
    <Reporting URL="http://MySSRSServer/MyReportServer"/>
    <OrganizationCollation>Latin1_General_CI_AI</OrganizationCollation>
    <basecurrency isocurrencycode="GBP" currencyname="GB Pound Sterling" currencysymbol="£" currencyprecision="2"/>
    <Organization>My CRM Organisation</Organization>
    <OrganizationUniqueName>MyCRMOrganisation</OrganizationUniqueName>
    <OU>DC=MyDomain,DC=local</OU>
    <WebsiteUrl create="true" port="5555"> </WebsiteUrl>
    <InstallDir>c:\Program Files\Microsoft Dynamics CRM</InstallDir>
    <CrmServiceAccount type="DomainUser">
      <ServiceAccountLogin>MyDomain\CRM-CRMSERVERr-A</ServiceAccountLogin>
      <ServiceAccountPassword>password</ServiceAccountPassword>
    </CrmServiceAccount>
    <SandboxServiceAccount type="DomainUser">
      <ServiceAccountLogin>MyDomain\CRM-CRMSERVER-SP</ServiceAccountLogin>
      <ServiceAccountPassword>password</ServiceAccountPassword>
    </SandboxServiceAccount>
    <DeploymentServiceAccount type="DomainUser">
      <ServiceAccountLogin>MyDomain\CRM-CRMSERVER-DW</ServiceAccountLogin>
      <ServiceAccountPassword>password</ServiceAccountPassword>
    </DeploymentServiceAccount>
    <AsyncServiceAccount type="DomainUser">
      <ServiceAccountLogin>MyDomain\CRM-CRMSERVER-AP</ServiceAccountLogin>
      <ServiceAccountPassword>password</ServiceAccountPassword>
    </AsyncServiceAccount>
    <VSSWriterServiceAccount type="DomainUser">
      <ServiceAccountLogin>MyDomain\CRM-CRMSERVER-VSSW</ServiceAccountLogin>
      <ServiceAccountPassword>password</ServiceAccountPassword>
    </VSSWriterServiceAccount>
    <MonitoringServiceAccount type="DomainUser">
      <ServiceAccountLogin>MyDomain\CRM-CRMSERVER-M</ServiceAccountLogin>
      <ServiceAccountPassword>password</ServiceAccountPassword>
    </MonitoringServiceAccount>
    <SQM optin="false"/>
    <muoptin optin="true"/>
  </Server>
</CRMSetup>
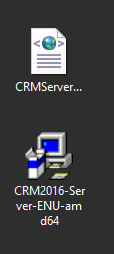
Both files, once ready, should look something like this:
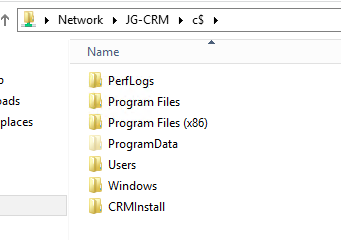
- The next step, presumably the trickiest, is actually getting the installation files onto our Core server. As we saw, on the Core installation we have limited command line functionality, making it impractical to simply “copy & paste” the files across. Fortunately, Core installations are configured so that the root drive can be accessed over a network connection; meaning that we can drop our files anywhere on the C:\ drive and access them via the cd command on the prompt window. To begin with, we will navigate to our computer using Windows Explorer on our other machine, replacing the JG-CRM with the name of your Core server:
We can then navigate through and create a temporary folder on the drive root where we can move across all of our required files:
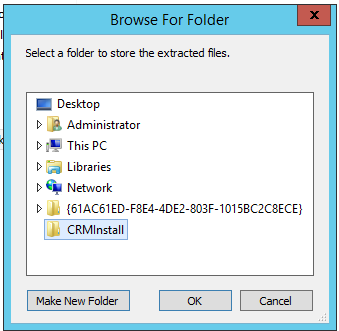
Finally, because the CRM2016-Server-ENU-amd64.exe file is a self-extracting executable, we need to first extract all of the files into a temporary location on our non-Core server; then, ensure that all of these files are copied across to our Core Server, along with our config. xml file:
- With everything copied across, we can begin the installation. Going back onto our Server Core, we first need to navigate to the location of our installation folder using the cd command:
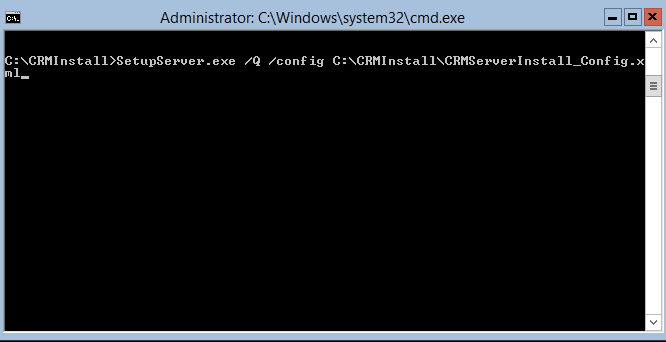
Next, we can run the CRM setup executable (SetupServer.exe), specifying the following required parameters:
/Q - Quiet Mode installation
/config C:\CRMInstall\CRMServerInstall_Config.xml - The file path to the config XML file that was copied across earlier
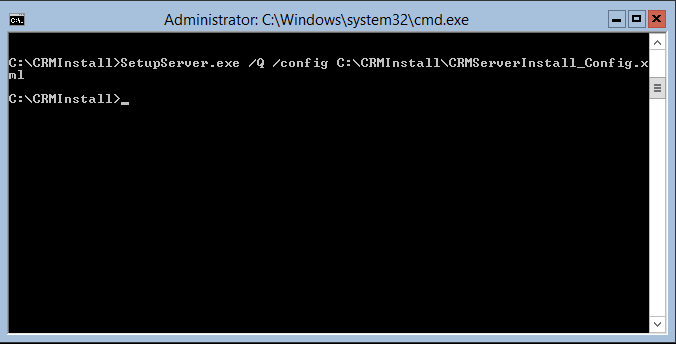
- Once we hit return on the above, the command will be accepted and you will immediately be given control back to the command prompt window:
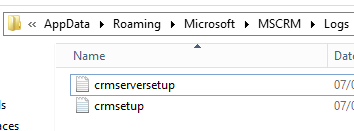
At this stage, you may assume that something has gone wrong. But don’t panic - this is just a result of specifying a quiet mode installation. CRM will begin installing in the background and stop if any errors are encountered. Progress can be monitored by reviewing the CRM setup log files from our other server, by navigating to the currently logged in users AppData\Roaming\Microsoft\MSCRM\Logs folder:
- Assuming your installation has been completed successfully, the following Server Roles will now be available on your Server Core:
- Web Application Server
- Organization Web Service
- Discovery Web Service
- Asynchronous Processing Service
- Sandbox Processing Service
- Deployment Web Service
The Help Server role will not have been installed, so therefore we must run the setup for this on another non-Server Core server. The Reporting Extensions role would need to be installed on the server that has your SSRS instance, so therefore it could not be installed on our Server Core server used above. I have also deliberately left out the Deployment Tools role as part of the above, which I would strongly recommend is installed on another Windows Server instance (for ease of access more than anything). The process is the same as part of any standard CRM installation and, therefore, will not be covered as part of this post.
Thoughts & Summary
Some of the more obvious benefits of having a Server Core CRM deployment have already been hinted at. For example, I think it is definitely useful to be a in a position where you can ensure that your CRM deployment is completely free from competing with other Server resources; a Server Core installation allows you to achieve this aim quickly and easily, in a way that is fully supported by Microsoft. Installing CRM in this manner also presents some interesting opportunities for managed hosting providers, as the manner of deployment and installation (via quiet mode installation) could be easily automated in order to enable re-sellers to quickly roll-out hosted CRM instances to their customers.
Taking a look at the other side of the coin, installing CRM via this route definitely requires some patience and perseverance. I encountered several issues during installation which cancelled the install entirely, due to incorrect Service Account Details, lack of account permissions etc. It will therefore take you a number of attempts before you can start to identify the common problems that need to be dealt with before commencing the silent installation, which would ideally need to be dealt with via PowerShell script automation or similar. I would also question why it is not possible to do a Full Install (minus Reporting Extensions) on a Server Core instance. My assumption would be that the Help Server & Deployment Tools rely on Windows Server features that are stripped out during a Core installation. If your ultimate aim is to minimise hardware costs by utilising Server Core, then having to factor in additional servers/hardware for an additional Windows Server on top of this seems excessive. You would then also begin to question why you would just not use a standard Windows Server instance to start with. Finally, there doesn’t appear to be any (obvious) means of specifying specific server roles to install as part of the silent installation. This kind of defeats the whole purpose of using Server Cores to scale out the workload of your CRM server across multiple Windows Servers.
In conclusion, should you be opting to have a CRM Server Core installation in the near future? I would say “not yet” for the simple reason that you cannot select specific Server Roles to install as part of installing CRM in this manner. In my mind, this eliminates one of the most obvious benefits of marrying together CRM and Server Core. Perhaps in future, when/if you can specify individual Server Roles in the config file (or if someone can correct me in the comments below!), this will become something that can be looked at more seriously. For now though, you can save yourself the hassle.
