Working with Dynamics CRM can present some interesting challenges. What you tend to find is that you can pretty much say “Yes!” when it comes to doing most things you would expect from a CRM/database system, but there is a learning curve involved in figuring out the best approach to take. Often, as well, you may over-complicate matters and overlook a much easier solution to achieve what you need.
Take, for example, modifying the FetchXML queries in a Public View that you have created programmatically. Let’s say you’ve created your own view within CRM using the following C# code snippet (adapted from the SDK sample):
SavedQuery sq = new SavedQuery
{
  Name = "My New View",
  Description = "My view created in C# for the Account entity",
  ReturnedTypeCode = "account",
  FetchXml = fetchXml,
  LayoutXml = layoutXml,
  QueryType = 0
};

_customViewId = _serviceProxy.Create(sq);
Console.WriteLine("A new view with the name {0} was created.", sq.Name);
A few things to point out first with the above:
- In order for this code to work, you would need to declare System.String values for fetchXml and layoutXml, as well as first connecting to CRM using the OrganizationServiceProxy (_serviceProxy).
- As well as specifying the FetchXML query you would like to use, you also have to specify a LayoutXML as a parameter in order to. Although Microsoft do have dedicated articles on MSDN that goes over the schema for this, there is a potential learning curve involved here for those who are unfamiliar with working with XML.
- ReturnedTypeCode is your entity logical name, which will need changing depending on the entity you are attempting to query
- Be sure to add in the appropriate namespace references, otherwise this code will not work.
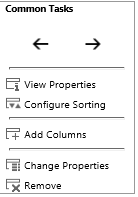
The code example above is all very well and good if you are just wanting to create a brand new view. But what happens if you need to change it in the future? We can modify the base properties of a view (Name, Description etc.) as well as the column layout via the CRM GUI, but when we attempt to modify the filter criteria (i.e. the FetchXML query), we will notice that the option is not available to use:
The next logical step would therefore be to look at creating some C# code that would take the existing view and modify the fetchXML query property. Unfortunately, Microsoft have not provided code examples on how this can be done, although it is in theory possible via the many methods at your disposal through the SDK.
Rather then spend days and potentially weeks writing a bespoke piece of code to do the job, it was then that I realised that I was being a little dense (as tends to happen) and that the Solution was sitting right in front of me. See what I did there?
Whilst the general rule of thumb is “DON’T DO IT!!” when it comes to modifying an exported solution file, it is possible to do and pretty much anything within a solution file can be changed or modified to suit a particular requirement. And, as luck would have it, modifying Public Views (either ones created by yourself or system ones) is a supported task that you can perform on the solution file:
Definitions of views for entities are included in the customizations.xml file and may be manually edited. The view editor in the application is the most commonly used tool for this purpose. Editing customizations.xml is an alternative method
Source: https://msdn.microsoft.com/en-gb/library/gg328486.aspx
So, in order to modify a custom Public Views FetchXML query, all you would need to do is:
- Create a temporary, unmanaged solution file containing the entity with the custom Public View you want to change.
- Export as an unmanaged solution, unzip and open the customizations.xml file either in Notepad, Visual Studio or the XML editor program of your choice
- Use Ctrl + F to locate the savedquery node of the view you wish to change. It should look like this:
<savedquery>
  <IsCustomizable>1</IsCustomizable>
  <CanBeDeleted>1</CanBeDeleted>
  <isquickfindquery>0</isquickfindquery>
  <isprivate>0</isprivate>
  <isdefault>0</isdefault>
  <returnedtypecode>1</returnedtypecode>
  <savedqueryid>{8e736028-47c7-e511-8107-3863bb345ac8}</savedqueryid>
  <layoutxml>
    <grid name="resultset" object="1" jump="firstname" select="1" preview="1" icon="1">
      <row name="result" id="accountid">
        <cell name="name" width="150" />
        <cell name="statecode" width="150" />
        <cell name="statuscode" width="150" />
        <cell name="ownerid" width="150" />
        <cell name="createdon" width="150" />
      </row>
    </grid>
  </layoutxml>
  <querytype>0</querytype>
  <fetchxml>
    <fetch version='1.0' output-format='xml-platform' mapping='logical' distinct='true'>
      <entity name='account'>
        <attribute name='createdon' />
        <attribute name='statuscode' />
        <attribute name='ownerid' />
        <attribute name='name' />
        <attribute name='statecode' />
        <attribute name='accountid' />
        <order attribute='name' descending='false' />
        <link-entity name='email' from='regardingobjectid' to='accountid' alias='ab' link-type='outer'>
          <attribute name='regardingobjectid' />
        </link-entity>
        <link-entity name='lead' from='parentaccountid' to='accountid' alias='al' link-type='outer'>
          <link-entity name='email' from='regardingobjectid' to='leadid' alias='lp' link-type='outer'>
            <attribute name='regardingobjectid' />
          </link-entity>
        </link-entity>
        <filter type='and'>
          <condition entityname='ab' attribute='regardingobjectid' operator='null' />
          <condition entityname='lp' attribute='regardingobjectid' operator='null' />
          <filter type='or'>
            <condition entityname='ab' attribute='createdon' operator='olderthan-x-weeks' value='1' />
            <condition entityname='ab' attribute='createdon' operator='null' />
          </filter>
        </filter>
      </entity>
    </fetch>
  </fetchxml>
  <IntroducedVersion>1.0</IntroducedVersion>
  <LocalizedNames>
    <LocalizedName description="My New View" languagecode="1033" />
  </LocalizedNames>
  <Descriptions>
    <Description description="My view created in C# for the Account entity" languagecode="1033" />
  </Descriptions>
</savedquery>
- Modify the FetchXML query within the node to your updated query
- (Optional) If your FetchXML query is simply making changes to the filter criteria, you can skip this step. Otherwise, if you have new fields that you would like to be displayed as part of the changes, you will also need to modify the node so that it contains your new fields.
- Save the changes back into the solution file and then import the solution back into CRM.
- Test your view by opening it within the application and confirm everything looks OK.
I’m sure you’ll agree that this is definitely a much easier and simple way to make changes to your view. Just be careful when working within the solution file that you don’t accidentally delete/overwrite something!

