
I’ve gone on record previously saying how highly I rate the Dynamics CRM/Dynamics 365 Customer Engagement (CRM/D365CE) community. Out of all the groups I have been a part of in the past, you couldn’t ask for a more diverse, highly passionate and - most importantly of all - helpful community. There are a lot of talented individuals out there which put a metric tonne of effort into providing the necessary tools, know-how and support to make our daily journey with CRM/D365CE that much easier to traverse.
An excellent case in point comes from the CRM DevOps extraordinaire himself, Ben Walker, who reached out me regarding my recent post on default SiteMap areas vanishing mysteriously. Now, when you are working with tools like XrmToolbox, day in, day out, the propensity towards generating facepalm moments for not noticing apparent things can increase exponentially over time. With this in mind, Ben has very kindly demonstrated a much more simplistic way of restoring missing SiteMap areas and, as he very rightly points out, the amount of hassle and time-saving the XrmToolbox can provide when you fully understand its capabilities. With this in mind, let’s revisit the scenario discussed in the previous post and go through the insanely better approach to solving this issue:
- Download and run XrmToolbox and select the SiteMap Editor app, logging into your CRM/D365CE instance when prompted:

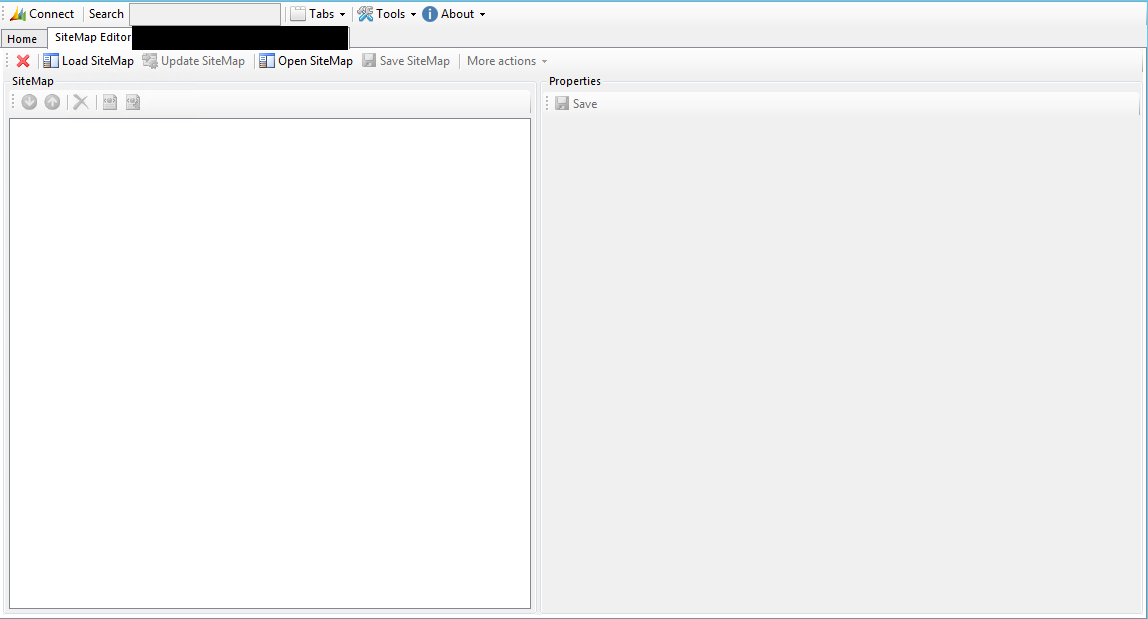
After logging in, you should see a screen similar to the below:
- Click on the Load SiteMap button to load the SiteMap definition for the instance you are connected to. It should bear some resemblance to the below when loaded:
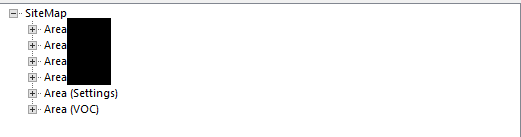
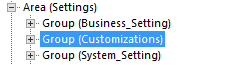
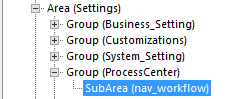
- Expand the Area (Settings) node. It should resemble the below (i.e. no Group for Process Center):
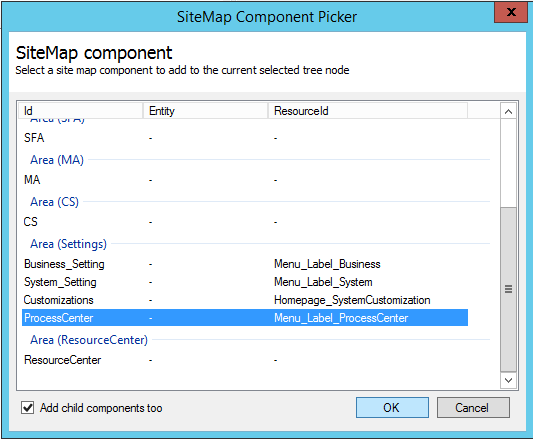
- Right click on the Area (Settings) node and select Add Default SiteMap Area button. Clicking this will launch the SiteMap Component Picker window, which lists all of the sitemap components included by default in the application. Scroll down, select the ProcessCenter option. Then, after ticking the Add child components too checkbox, press OK. The SiteMap Editor will then add on the entire group node for the ProcessCenter, including all child nodes:
- When you are ready, click on the Update SiteMap button and wait until the changes upload/publish into the application. You can then log onto CRM/D365CE to verify that the new area has appeared successfully.
I love this alternative solution for a number of reasons. There are fewer steps involved, there is no requirement to resort to messing around with the SiteMap XML files (which has its own set of potential pitfalls, if done incorrectly) and the solution very much looks and feels like a “factory reset”, without any risk of removing other custom SiteMap areas that you may have added for alternate requirements. A huge thanks to Ben for reaching out and sharing this nifty solution and for rightly demonstrating how fantastic the CRM/D365CE community is 🙂