This may be somewhat obvious from some of my more recent blog posts, but I am a huge fan of Application Insights at the moment. The best analogy I can use for it is that it’s a web developer Swiss Army Knife, that really puts you in the driving seat of understanding and maintaining your web application for the long term. The analytic tools available on the “knife” - from error reporting, user trends and server performance - provide a treasure trove of information that can help to shape successful software deployments and ensure that developers are properly understanding the impact of their work within a production environment. If you are developing web applications utilising the Azure stack, there really is no good reason not to use it; and, even if you are not, you can still utilise the tool wherever your web application is hosted.
Recently, whilst fiddling with the tool, I was surprised to find another feature which I had overlooked - Availability testing. In simple terms, this enables you to configure proactive monitoring of your web application to make sure it is responding to requests. This can be particularly useful if you have availability targets or SLAs that your web application needs to adhere to. The feature is also tightly integrated alongside the other performance metrics gathered by the service, making it the ideal choice for satisfying any data analytic requirements. I wasn’t aware of the feature until I implemented it recently, so what I wanted to do on this weeks blog post is demonstrate how straightforward it is to set up Availability testing within Application Insights.
Setting up your first Availability Test
What ultimately aids the journey towards configuring for your first test is the simplistic nature of the process; however, there are a couple of settings that may require further explanation. The remainder of this section will go through the steps involved from start to finish. Be sure to have provisioned an Application Insights resource before starting and confirm that your target website is readily accessible over the internet.
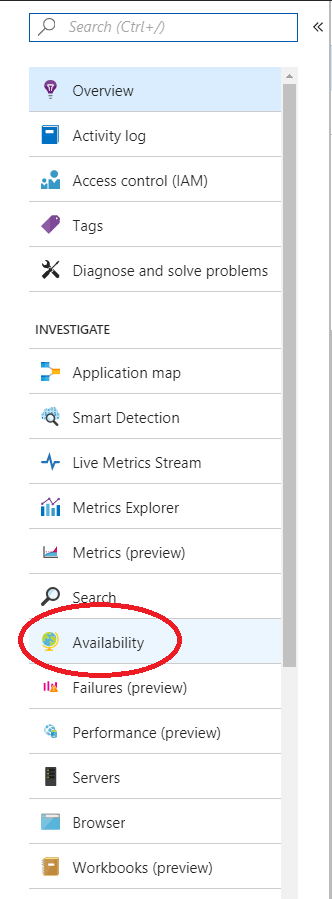
Once your Application Insights resource is provisioned, navigate to the Availability tab on the left-hand side of the resource blade:
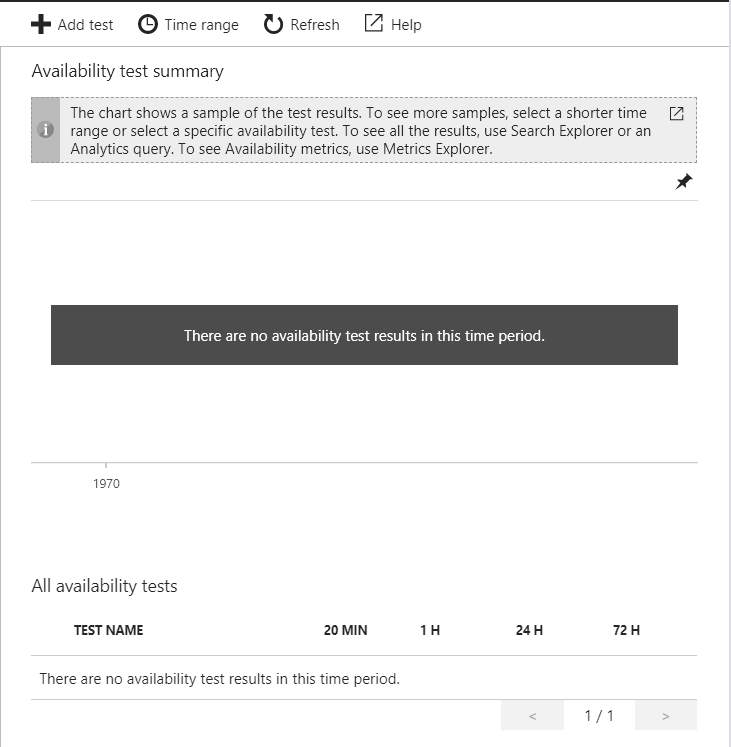
This will then expand the Availability test summary window, which should be blank as indicated below. Click on the Add Test button to begin creating the test:
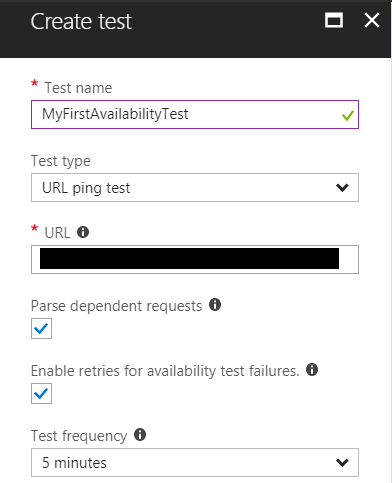
There are a couple of basic information fields that need populating at this juncture:
- Test name: This shouldn’t need explaining 🙂 Keep in mind the importance of having a unique name for the test, particularly if you are planning on utilising the reporting capabilities discussed later on in this post.
- Test type: You have two options at your disposal here - a simple URL ping test, that contacts the URL you specify and captures the response code from the server, or a Multi-step web test, a more powerful test that carries out a set of predefined steps when crawling through your website. Visual Studio Enterprise is required to put these tests together and there are pricing implications when using it. You can find out more about this option via the Microsoft Docs website. For this example, we are going to the use the URL ping test.
- URL: This is the exact URL that will be contacted as part of the test. This will either be the root azurewebsites.net domain or your assigned custom domain.
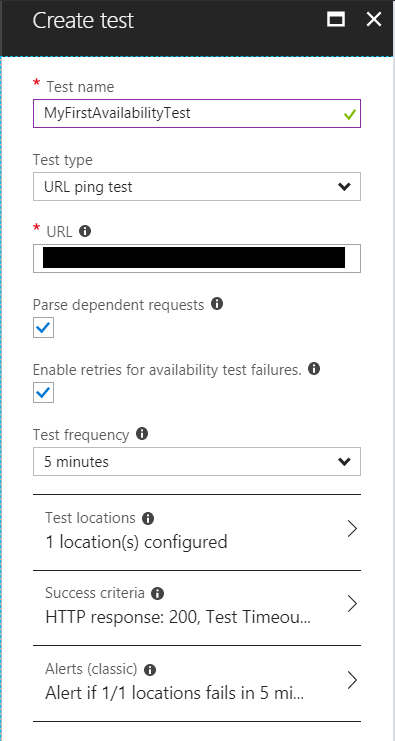
Your Create test window should resemble the below after configuring the above:
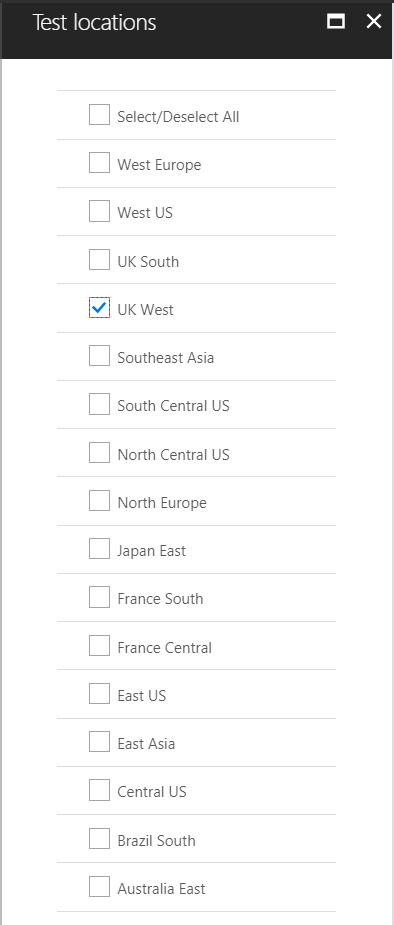
The next step is to define the location where your test will be triggered from. If you are hosting your application in an existing Azure region, then it is recommended to select the next nearest geographical region for testing. Multiple regions can also be selected. In the example below, UK West is selected due to the website in question existing in the UK South region:
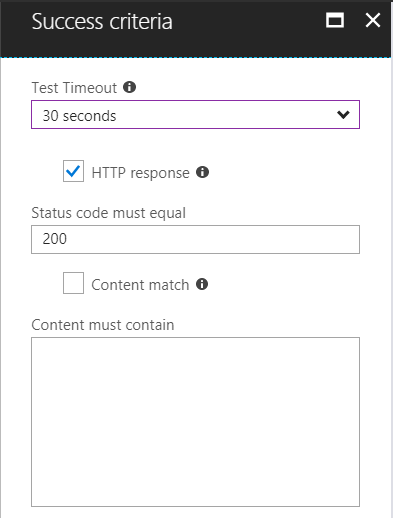
Next is to define your success/fail conditions for the test. This will vary depending on the type of test you a conducting, but for URL ping test’s, you can define a timeout period for the test and also determine whether a specific HTTP response code is returned each time the test is executed. A 200 response code is the standard for indicating that a web page has loaded successfully, so this is the one that will be used for this example. You can also define this further by checking for specific keywords in the response text:
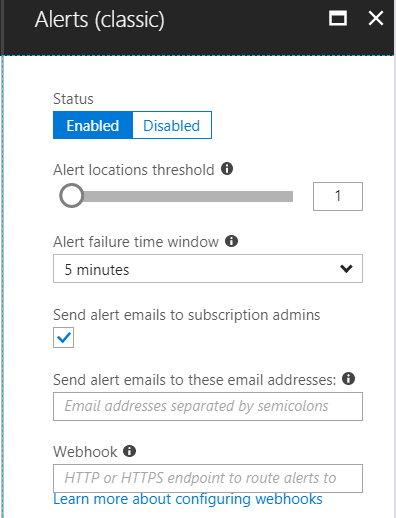
Finally, you can designate the alert settings for when a failure is detected. This can range from an email to a specified list of contacts (more on this shortly) through to a webhook notification to an external HTTP/HTTPS endpoint. Example settings are utilised in the below screenshot that should be suitable for most scenarios:
With everything configured, your Create test window should resemble the below if done correctly:
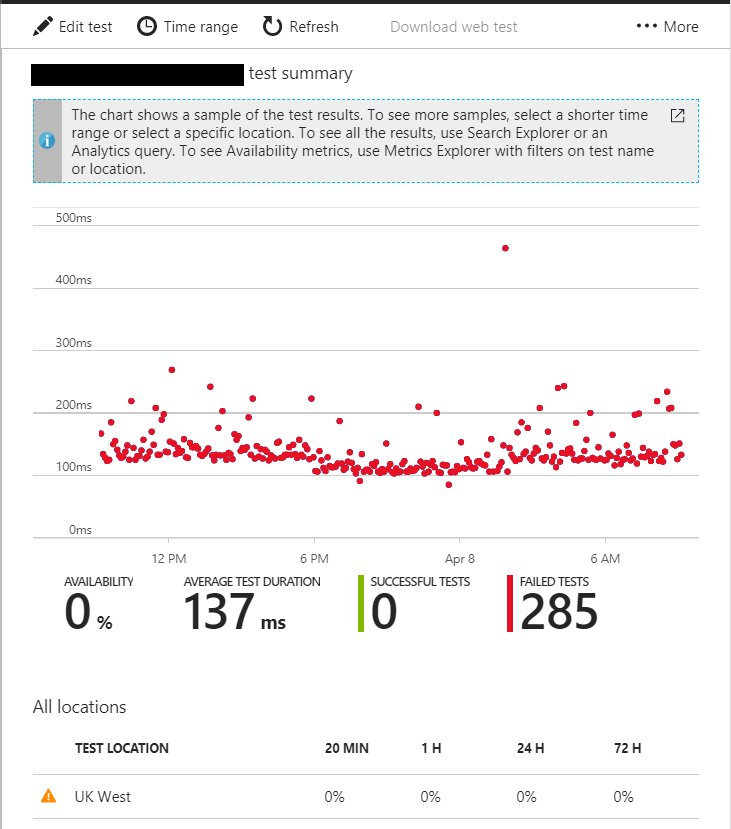
Press OK to create your test, which will begin executing immediately. You will need to wait some time for results to start appearing. For this example, we are attempting to query a website that has a specific deny rule for any non-allowed host, including the Availability test server. This is reflected in the results below, which indicate a 100% failure rate for the selected period:
Failed Test Notifications
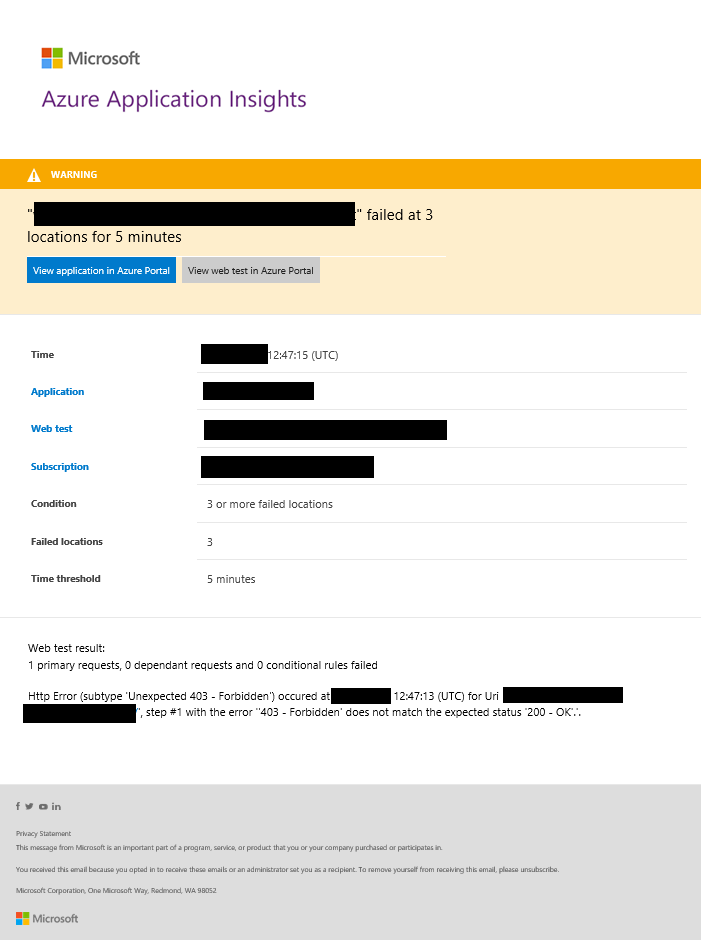
As part of the example above, the test is configured to send email notifications out to Azure subscription owners when a fault with the application is detected. An example of how this looks can be seen below:
Whilst the above is useful for application developers/administrations to receive proactive notifications relating to their web applications, it doesn’t provide much from a reporting standpoint. Fortunately, this is where one of the features major benefits come into the equation.
Analysing Previous Availability Tests
Similar to other statistical information gathered by Application Insights, the results of each individual test are logged within Query Analytics as part of the availabilityResults schema. The following query can be used within Query Analytics to return key information for failed tests within a 24 hour period:
availabilityResults
| project timestamp, id, name, location, success, message, duration, appId, appName
| where success == 0 and timestamp > ago(24h)
If you are also wanting to utilise the Continuous Export feature, as discussed previously on the blog, then the great news is that this information is also fully exportable to your destination of choice. A SQL database, Power BI Dashboard, Azure Event Hub…your options are quite limitless 🙂 Below is the query that you can use to extract the key information from your Continuous Export stream:
SELECT
    availabilityFlat.ArrayValue.testTimestamp AS TestTimestamp,
    availabilityFlat.ArrayValue.testRunId AS TestRunID,
    availabilityFlat.ArrayValue.testName AS TestName,
    availabilityFlat.ArrayValue.runLocation AS RunLocation,
    availabilityFlat.ArrayValue.result AS TestResult,
    availabilityFlat.ArrayValue.message AS Message,
    availabilityFlat.ArrayValue.durationMetric.value AS Duration,
    AR.EventProcessedUTCTime AS AvailabilityResultEventProcessedUTCTime
INTO AvailabilityResultsOutput
FROM AvailabilityResults AS AR
CROSS APPLY GetElements(AR.[availability]) AS availabilityFlat
Conclusions or Wot I Think
The best things in life are those that just keep on giving. My journey with Application Insights to date very much mirrors this. The number of business challenges and scenarios that I have been able to chuck towards it and walk away with an effective and easy-to-implement solution is growing every month. For me, it is slowly becoming the de facto tool to have deployed alongside any new web application. The ability to extend the tool further so that is not just providing ongoing benefit but proactive capabilities, via the Availability feature, is the main area where I feel the tool thrives the most, both now and in the future. Anything that can take the headache out of diagnosing enterprise-grade web application systems, whilst simultaneously driving insight into how a website experience can be improved for end users, wins in my book and Application Insights keeps continually proves itself in this regard.

