Welcome to the second post in my series, focused on providing revision notes for the MB-400: Microsoft Power Apps + Dynamics 365 Developer exam. In last week’s post, we looked at some of the fundamental concepts and theory around the Power Platform, in support of the first learning objective - Create a Technical Design. Next, we’ll focus towards some more practical focused content, as we dive into the Configure Common Data Service topic, which has the following learning objectives:
Configure security to support development
- troubleshoot operational security issues
- create or update security roles and field-level security profiles
Implement entities and fields
- configure entities
- configure fields
- configure relationships
Create and maintain solutions
- configure solutions
- import and export solutions
- manage solution dependencies
With a 15-20% total weighting on the exam, there will undoubtedly be many questions testing your knowledge of fundamental customisation topics - more so when compared with previous iterations of this exam.
As with all posts in this series, the aim is to provide a broad outline of the core areas to keep in mind when tackling the exam, linked to appropriate resources for more focused study. Your revision should, ideally, involve a high degree of hands-on testing and familiarity in working with the platform if you want to do well in this exam.
But let’s stop beating about the bush and jump into the above topic area in closer detail 🙂
How Security Works in the Common Data Service
The Common Data Service (CDS) / Dynamics 365 provides an incredible amount of features to help implement even the most stringent access requirements. As such, developers can leverage this existing functionality to help speed up development and focus on building a workable solution, rather than divert time/effort towards creating a sophisticated security model out of the box. At a high-level, the following features are made available to us from a security standpoint:
- Business Units: These act as hierarchical containers for your data, allowing you to restrict access to records, based on a logical structure. Typically, this may be mapped based on an organisational structure or geographic locations within a global organisation. All user accounts must exist within a single business unit, and there is a requirement that all CDS environments have at least one root business unit. For further details on this topic, please refer to the following Microsoft Docs article.
- Security Roles: The cornerstone of security within the application, Security Roles provide users with the permissions needed to interact with CDS data. We’ll be taking a much closer look at this feature in the next section.
- Teams: Although typically used to sub-categorise users within a Business Unit, Teams can be assigned Security Roles, to help you simplify assigning privileges in bulk. It is also possible to configure an Access Team template, allowing end-users to quickly grant permissions to a record, without the need for any further customisation. Find out more about how to manage Teams with the following Microsoft Docs article. To find out more about access-teams and how to set them up, please consult this article instead.
- Field-Level Security Profiles: Sometimes, it may be necessary not only to restrict a whole entity but also the contents of a specific field. An excellent example of this involves credit card numbers. Although it is desirable to grant users the ability to enter this information on record creation, restricting access beyond this point would be highly beneficial. Field-level Security Profiles can help meet this requirement and will be discussed in more detail shortly.
- Record Sharing: All users within the application, provided they’ve been assigned the relevant Share privilege at a Security Role level, can grant temporary or indefinite access to records. This feature can be useful for situations where someone is going away for a few weeks, and you need to provide temporary access to a colleague covering this absence.
Developers have the flexibility to use one or several of these features when building out their solution. Typically though, Security Roles will be the one area where most attention is diverted to, particularly when you are creating new entities.
Discussing Security Roles
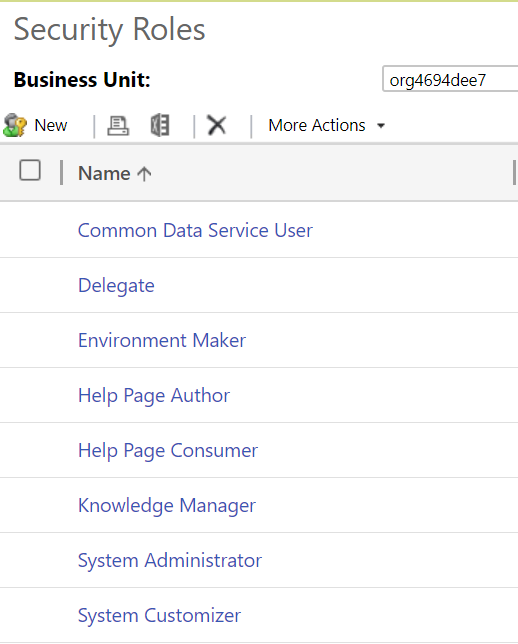
Users accessing the CDS / Dynamics 365, either via a model-driven app, Power BI or another mechanism, must be assigned a security role. The Security Role defines which entities, features and other components within CDS the user can manage. By default, all CDS instances come equipped with several out of the box roles, indicated below:
At the time of writing this post, although it’s possible to add Security Roles to a solution within the new Power Apps portal, creation and modification of them takes place within the classic interface.
Security role permissions can be broke down into two broad categories - record-level and task-based privileges**.** Also, access level privileges will apply to certain entities. The bullet points below provide a general summary of each of these topics:
- Record-level Privileges: Available for all entities, regardless of their ownership type, these permissions define the specific access privileges that a user can achieve against an entity. These, by and large, following a CRUD concept for persisted storage (Create, Read, Update and Delete). Specifically, the full list of privileges are:
- Create: Allows the user to create new records for this entity.
- Read: Allows you to read the record entirely, but make no changes.
- Write: Allows you to modify existing records of this entity.
- Delete: Let’s you delete the entity record in question.
- Append: Allows you to associate the entity with another entity record
- Append To: Allows other entity records to be related to this entity record.
- Assign: Allows you to re-assign the record to another user
- Share: Let’s you share the record to other users.
- Task-Based Privileges: These typically allow you to carry out a specific, non-entity bound action with the application. For example, you can grant permissions for users to Create Quick Campaigns or Assign manager for a user.
- Access-level Privileges: Going back to Business Units, the CDS security model lets you define whether users can access records within their Business Unit, in ones directly underneath them or across the entire organisation. These granular level privileges are only available if you have configured an entity with an ownership type or User or Team. Entities with Organisational level privileges do not support this and, instead, it is necessary to grant all or zero permissions. The full list of levels available for selection within the application are:
- Organization: Users allowed this level of access to an entity have unrestricted access across the system, regardless of which business unit the record resides within.
- Parent: Child Business Units: With this privilege level, users can interact with all records of the entity in their current Business Unit or any child Business unit, regardless of depth.
- Business Units: At this level, users can only interact with records in their current Business Unit. Depth access does not apply in this scenario. For example, if I’m granted Read Business Unit level privilege, I’d be unable to read any records within a child, grandchild etc. business unit.
- User: The most restrictive level, only records which I own or shared to me will be accessible if granted this level.
Altogether, Security Roles provide a robust, granular and flexible approach to locking down areas of the application or ensuring that users only get to interact with records they own, for example. To find out more about Security Roles, please refer to the following Microsoft Docs article. Security Roles is a massive topic in of itself, and impossible to cover in-depth as part of a single blog post.
Field-Level Security Profiles
We’ve already touched upon just what Field-Level Security profiles are, so let’s dive into some of the more finer points of their functionality.
A system administrator/customiser must create a Field-Level Security Profile and, in most cases, will be included as part of a solution. The 2-step setup process will involve:
- Enabling the Field Security property on each field to secure: Developers must do this on every field that requires securing, and there are no settings that require enabling at the entity level first. Certain field types, such as the Primary Key field, are not supported for field security.
- Update or create a new Field Security profile, defining your required privilege level: A profile will expose all fields enabled in the system for field security, for which you must then specify the following settings:
- The users or teams that the profile applies to.
- The actual permissions to grant to the users or teams assigned to the profile. The following permission types are available; it is possible to mix and match these privileges, to suit your requirements:
- Read
- Create
- Update
To find out more about how to setup field-level security and profiles, you can refer to the following Microsoft Docs article.
Troubleshooting security issues
Typically, the bane of any Dynamics 365 / CDS administrators life will be in resolving access or security-related issues, which can be tricky to navigate and fall through the net during any UAT testing. The list below provides a flavour of some of the things to watch out for when working with some of the security features discussed so far:
- Review any generated error message carefully. These will almost always indicate the missing privilege and the affected entity, thereby allowing you to modify any assigned security role accordingly.
- Where possible, try and base any security role off an existing, out of the box role and tailor it accordingly. There is a myriad of minimum privileges required to open a model-driven app in the first place, which can prove challenging to figure out when creating a security role from scratch.
- A field enabled for field security will only be visible to system administrators within the application if no similar field security profile has been set up and assigned within a model-driven app. Consider the impact this may have when enabling this property for this first time.
Demo: Setting up a Security Role and Field-Level Security Profile
To get a flavour of what is involved in setting up a new security role or field-level security profile, check out the video below:
Entities Overview
Entities are the core objects within Dynamics 365 / CDS. From a developers perspective, they are in effect tables within the backend SQL Server database of the platform, used to store individual record data for each of our different data types within the system. Many entities, covering common business scenarios and adhering to the Common Data Model, are given to us by default. For example, the Account entity contains all the essential information we may store regarding companies that your organisation works with daily. As developers or customisers of the system, we can go in and create new entities, to cover bespoke requirements. Also, we have the ability to:
- Modify the properties for an entity. For example, we can enable an entity for SharePoint Online document management functionality.
- Add new custom fields to an entity, to record missing information required by our organisation.
- Setup or modify existing relationships between entities to, for example, ensure specific field values are mapped across automatically.
In short, we have a range of features at our disposal to store any potential type of information within Dynamics 365 / CDS, allowing us to leverage additional built-in features, where required.
Entity customisations is a topic area that is impossible to cover as part of a single blog post and is typically the focus of 2-3 day courses to fully grasp. The purpose of the next few sections is to focus attention on the core concepts that you will need to have in the back of your mind when tackling the exam.
Working with Entities
When first contemplating whether to create a new entity or not, you must make some critical decisions regarding how to configure the entity, including:
- Name attributes: All entities must have a Display Name, Plural display name and Name (i.e. logical Name) value specified for them.
- Primary Field Details: All new entities must have a text field defined for them, that represents the value shown for each created record within the interface. We have full flexibility to specify the display and logical name value for this field, but its underlying data type (Single Line of Text) cannot be changed.
- Attachments/Notes: Entities created can be set to work alongside attachments and notes within the application. Take a look at the following blog post to find out more about this feature.
- Description: You can provide a useful explanation of what the entity is here, to better inform others as to its purpose.
- Entity Type & Ownership: Here, two critical options can be specified:
- Entity Type: Specifies whether it is a Standard or an Activity entity. Typically, you should select Standard for your entity, unless you wish to use it to record a specific type of activity (e.g. Home Visit, WhatsApp message etc.) that must be visible within the Social Pane (i.e. the Notes control) in the application.
- Ownership: As alluded to earlier, this will affect whether the entity is subject to more granular access level controls, via the Business Unit hierarchy in the system, or not. In most cases, unless you are sure the entity needs to be accessed by everyone within the organisation, you should select the User or team option.
- Create and Update Settings: Within this area, an entity can be configured for use alongside Quick Create forms, enabled for duplicate detection or setup for change tracking.
- Dynamics 365 for Outlook Settings: Here, you can enable the entity for offline use within the Dynamics 365 for Outlook application. Note that this refers to the desktop application, not the online-only Dynamics 365 App for Outlook.
Most of the standard options for entities will be visible within the new Power Apps portal, as indicated below:

Any other setting not visible here will instead be visible in the classic portal.
For existing entities, for the most part, we can carry out the following actions:
- Modify its display and plural display name value.
- Change its description.
- Enable or disable additional features, such as support for Queues or Feedback.
- Delete the entity (custom entities only)
However, some system entities may behave differently or have certain features permanently disabled/enabled.
Although not a mandatory requirement, I would highly recommend to carry out all entity customisations within a solution; we will discuss further details on this topic later.
For more information regarding entities, you can consult the following Microsoft Docs article.
Fields (AKA Attributes)
Fields are the specific attributes to record data. In SQL Server, we would typically refer to these as columns. We can modify or create new fields based on a wide range of different field types available to us. When creating one from scratch, we must specify the following details:
- Display & Logical Name
- Type: e.g. Single Line of Text, DateTime etc.
- Business Requirement: Here, you can specify whether users must always specify a value for this field before saving the record. By default, this option defaults to Not Required.
- Searchable: Enabling this option will allow customisers or Advanced Find users to use this field when creating views or searching for data. My understanding is that the application adds any field marked as Searchable to indexes behind the scenes, thereby speeding up any searches performed; I’d, therefore, recommended enabling this property when you anticipate frequent querying of any data.
- Calculated or Rollup: Specifies whether the field should be set up as a calculated or rollup field type. These field types are typically most useful to generate aggregate information or for use within a reporting solution. You can find out how to work with these field types in more detail, by reading through the calculated fields and rollup fields Microsoft Docs articles.
- Description: Here, you can provide a useful summary of the purpose of the field. Any value saved within this field will then get displayed to users within a model-driven app, whenever they hover their mouse over the name of the field.
For each field and its corresponding type, we can fine-tune additional details relating to it. The following article summarises some of these properties in further detail. It is impossible to cover all potential scenarios within this blog post, so I would encourage you to experiment with creating all possible field types within a test environment.
Comparing 1:N, N:1 and N:N Relationships
When modelling a SQL database, it is desirable to create multiple tables, with any required links implemented via FOREIGN KEY relationships. This type of modelling not only allows you to create hierarchical relationships if desired but also to ensure that your solution remains scalable. Dynamics 365 / CDS leverages the built-in functionalities within SQL Server, by allowing you to define several different types of relationships within the application:
- 1:N & N:1: These relationships are effectively the same, and describe either a one to many (1:N) or many to one (N:1). Regardless of their configured direction, they allow you to have a single parent record, with many related records. An example of a system 1:N relationship is the one between the Account and Contact entities; a single Account can have many associated Contacts.
- N:N: Many-to-many (N:N) relationships are a bit more usual, primarily because of the way they can be customised. They describe a situation where you must have many entity records related to many other records. An excellent example of the type of scenario where this may be useful is if you have Event and Attendee entities set up within the system; many events can have many attendees. Therefore, this would be an appropriate use case for a many-to-many relationship. As mentioned earlier, these types of relationships are an oddity, as you can configure them in one of two different ways:
- Native N:N: This is where you let the system wholly manage the relationship and its setup for you. Behind the scenes, the system will create a hidden intersect entity to record all N:N relationship instances. This entity will remain inaccessible and cannot be customised further. This is the default and recommended option if you do not need to record additional properties relating to your N:N relationship.
- Manual N:N: In this scenario, you create the intersect entity yourself. Then, you set up 1:N relationships between your two different entities to the intersect entity. As you have full control over the intersect entity, you can customise this entity further to record additional attributes. This type of N:N relationship is most suitable for advanced scenarios only.
Typically, you would navigate to the Relationships tab within the Power Apps portal to create these. However, you can also create a relationship by adding a field of type Lookup to your entity. To find out more about the different types of relationships and, specifically, native and manual N:N relationships, consult the following Microsoft Docs article.
Once a relationship has been created, you can also specify additional options concerning field mappings. Field mappings allow for data to be quickly copied across to new records when created from a primary record. For example, field mappings exist between the Lead and Opportunity entities, meaning that specific fields will automatically copy across to the Opportunity entity whenever a Lead is qualified. In most cases, you will need to ensure that the source and target field are of the same type and a target field cannot be subject to multiple source mappings. Further details on this feature and how to begin working with it can be found on the following Microsoft Docs article.
Demo: Entity, Field and Relationship Creation
The process of creating everything mentioned so far can take some time to complete. The video below aims to demonstrate how to achieve all of this, using the new Power Apps interface:
Solutions Overview
Solutions are almost certainly a mandatory requirement when building any customisations involving Dynamics 365 or CDS. As well as acting as a container for all of the custom components you have developed, they are also useful in:
- Uniquely identifying your components compared to other developers, projects or external functionality, when used in conjunction with a Solution publisher/prefix.
- Providing a precise and controlled mechanism for deploying out changes across multiple environments, either in their entirety or via patches.
- Enabling you to work with a subset of components
Let’s dive now into the central topics of Solutions that you developers need to grasp as a minimum
Managed versus Unmanaged Solutions
There are two types of solutions that Dynamics 365 / CDS supports - managed and unmanaged. By default, all solutions exist in an unmanaged state upon creation; only by exporting a solution for the first time do you have the option of making it managed. The key differences between both types of solutions are:
- Unmanaged
- Solutions of this type are removable from an environment, but all underlying components/changes will remain; these will have to be removed or reverted manually.
- Developers/customisers can freely modify components within an unmanaged solution.
- Recommended for exporting solutions to other development/testing environments or for storing as part of a source control system (e.g. Git)
- Managed
- Solutions of this type are removable from an environment. This action will permanently delete all underlying components, including any entity data.
- Typically, other developers/customisers will be unable to modify components within a managed solution, unless this has been enabled via each components managed property.
- When importing an updated managed solution to an environment, all existing components within the current managed solution are overwritten completely.
- Recommended when deploying a final, thoroughly tested solution into a production environment.
Developers should always be mindful of how unmanaged/managed components expose themselves in the application as part of solution layering. The diagram on the following Microsoft Docs article provides an excellent summary and visualisation of how solutions are applied within an environment. You can also use the solution layering feature to inspect how components have been affected by any solutions applied to an environment.
Solution Publishers & Prefixes
When creating a solution, developers and customisers should always specify a solution publisher. This helps to identify components belonging to a particular organisation or business area and avoids a bad practice situation where customisations or components are prefixed using new_. It is possible to create a new publisher and prefix when creating a new solution. The following details are required at a minimum:
- Display Name
- Name
- Prefix
- Option Value Prefix
As a rule of thumb, generally, a single publisher/prefix is sufficient for one organisation.
Solution Patches
In specific scenarios, there may be a business-critical change that needs to be rushed out, without the need to performing a full update of all components within a solution. Solution Patches provide a mechanism to deploy out small changes within an overall solution, targeting only the segments that require changing. This action creates a new, separate solution, containing only the underlying components that need pushing out. Later on, all patched solutions can be “rolled up” into the master solution as part of a regular update or upgrade.
I’ve blogged previously on how to work with solution patches; although these steps do refer to the classic interface, they will be mostly the same within the new Power Apps experience. The following Microsoft Docs article provides more up to date information regarding their functionality.
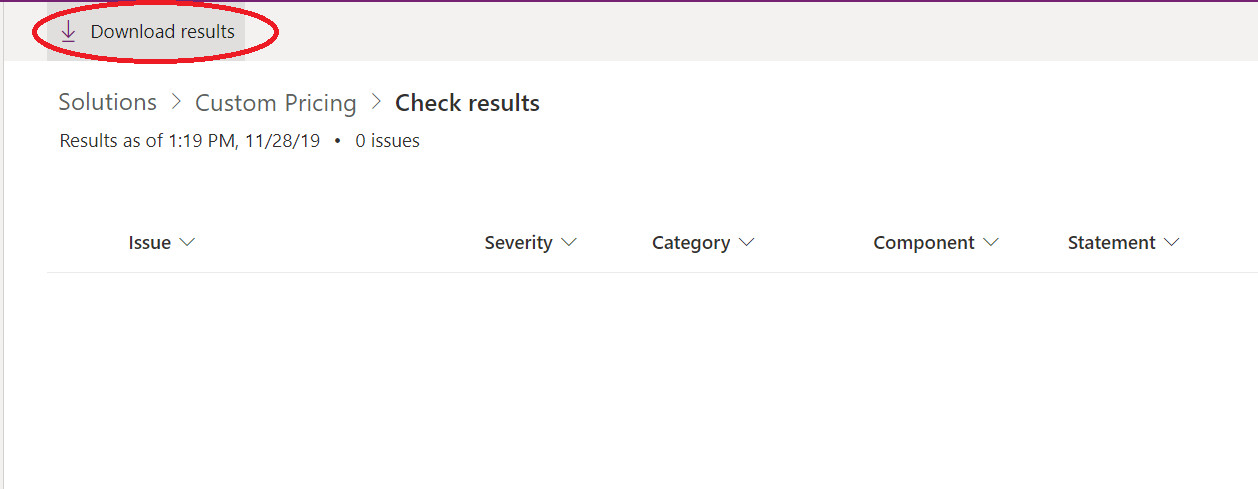
Using the Solution Checker
Developers building out solutions must always be aware of not mistakenly putting in place solutions which do not follow best practice approaches or contain functionality that could be subject to deprecation in future. Unfortunately, it is not always straightforward to perform this kind of in-depth analysis. Recognising this fact, Microsoft has made available a Solution Checker tool, which can automatically scan any solution and highlight the types of issues mentioned earlier. You must first install the Solution Checker from AppSource before it can be used; once installed, you can then run it against any solutions within your CDS environment or whenever you export a solution from your environment. The Solution Checker can take up to 10 minutes to run, depending on the size and complexity of the components contained within. Once executed, you will then be able to view the results and export them from the Power Apps portal, as indicated in the screenshot below:
Demo: Working with Solutions
To find out how to create a solution and export it from Dynamics 365 / CDS, check out the video below:
The scale of functional topics covered by this exam emphasises more than ever the importance of being aware of what Dynamics 365 and the Common Data Service provides to developers out of the box and why these features should be leveraged wherever possible. Hopefully, this post has familiarised yourself with these topics sufficiently. In next week’s post, we’ll dive into Power Apps and how to create both model-driven and canvas apps.